Table des matières
How to recover system and game overlays
ARRM allows the recovery on Screenscraper of images allowing to create overlays with their configuration files for systems and games for Recalbox, Batocera and Retropie which each use different processes. ARRM can detect the transparent/translucent areas of an overlay image and thus deduce the coordinates that it will apply in the overlay configuration files.
Below, explanations will be given for the RECALBOX, BATOCERA and RETROPIE systems which use different methods to manage overlays.
If you want to get started immediately with the recovery of overlays and associated configuration files, go to the following paragraph:
If, on the other hand, you are interested in the operation of ARRM in the creation of configuration files associated with overlays, you can read the paragraph
this <bezel> tag seems enough for Retrobat V6 to show the bezel with no need of config file
_Video Tutorial for BATOCERA: Overlay Systems
Watch video
_Video Tutorial for BATOCERA: Games Overlay
_Video Tutorial for RECALBOX: Overlay Systems
Watch video
_Video Tutorial for RECALBOX: Overlay Games
Recovery of system and game overlays with ARRM for Batocera, Recalbox and Retropie
To assimilate the operating principle, read the paragraph Principes de fonctionement.
You will now be able to automatically recover your system and game overlays.
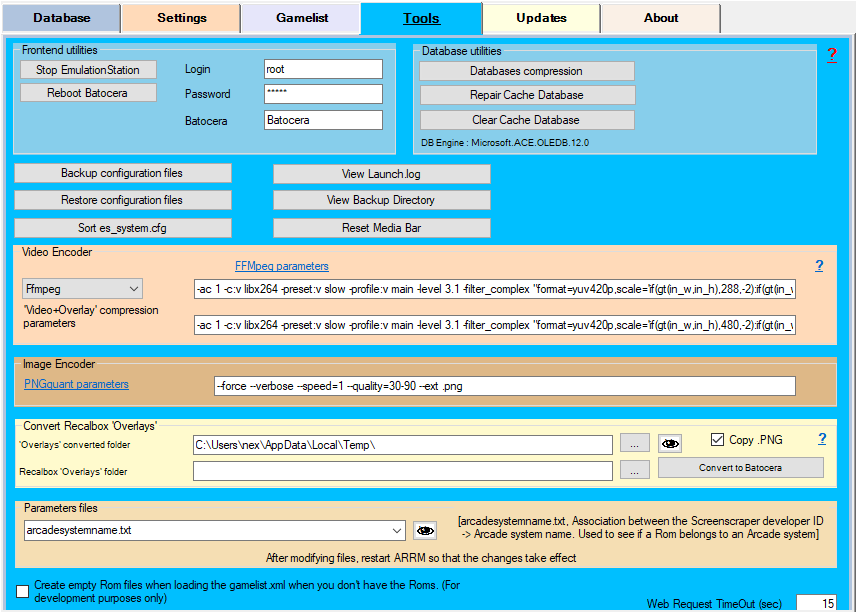
Remember to fill in the Login, Password, Frontend name parameters in the TOOL tab as well as check your Batocera, Retropie, or Recalbox frontend if you use one of these frontends via the Settings tab, and General Options tab.
It is imperative to choose the Repertory of Bezels in the panel below
It could be :
- from a local directory (recommended), in this case you will have to copy the directory
- 'overlays' under \\recalbox\share for Recalbox
- 'decorations' under \\batocera\share for Batocera or X:\retrobat for Retrobat
- 'configs' under \\retropie for Retropie
- from the directory
- \\recalbox\share for recalbox
- \\batocera\share for batocera
- X:\retrobat for retrobat
- \\retropie for retropie
If access to the \\retropie directory is denied you can specify \\retropie\configs. In this case it will be necessary to modify the paths relative to retropie in the file %appdata%\Nexouille soft\arrm\database\overlays_path.txt in this way:
Before
# retropie
retropie_directory_input_overlay_game|/opt/retropie/configs/all/retroarch/overlay
retropie_directory_input_overlay_system|/opt/retropie/configs/all/retroarch/overlay

retropie_directory_cfg_system|\configs\
retropie_directory_overlay_system|\configs\all\retroarch\overlay\

retropie_directory_cfg_game|\configs\all\retroarch\config\
retropie_directory_overlay_game|\configs\all\retroarch\overlay\
After
# retropie
retropie_directory_input_overlay_game|/opt/retropie/configs/all/retroarch/overlay
retropie_directory_input_overlay_system|/opt/retropie/configs/all/retroarch/overlay

retropie_directory_cfg_system|\
retropie_directory_overlay_system|\all\retroarch\overlay\

retropie_directory_cfg_game|\all\retroarch\config\
retropie_directory_overlay_game|\all\retroarch\overlay\
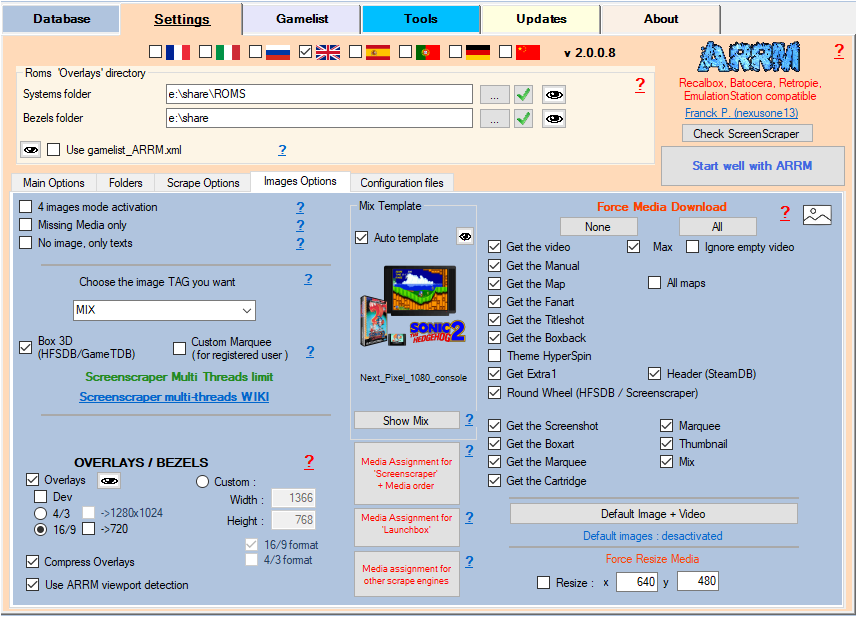
Check the Overlays box and choose the desired format. Attention, prefer the 16/9 format which has many overlays compared to the 4/3. Clicking on ![]() takes you to the default configuration files.
takes you to the default configuration files.
Remember to configure the template files (see tips above).
- To create system overlays
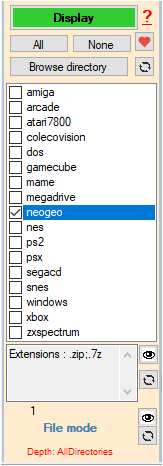
Select systems:
and click on the 'System Overlay' button.
Your overlays will be installed directly in your Box if you have chosen as overlays directory:
- \\recalbox\share (for recalbox)
- \\batocera\share (for batocera)
- \\retropie (for retropie)
or you can copy/paste them from your local directory, to
- \\recalbox\share (for recalbox)
- \\batocera\share (for batocera)
- \\retropie (for retropie).
With Batocera the recovered files will be in the overlays recovery folder, then '\decorations\mybezels16-9\systems\'
With Recalbox the recovered files will be in the overlays recovery folder, then '\overlays\%systeme%'
With Retropie the recovered files will be in the overlays recovery folder, then '\configs\'
- To create game overlays
Select your Roms and click on Screenscraper. If you only want to retrieve/create overlays, check 'No image, only texts' in the 'image options' configuration tab to speed up the process. Your overlays will be installed directly in your recalbox if you have chosen as overlays directory: \\recalbox\share (for recalbox) or \\batocera\share (for batocera) or \\retropie (for retropie), or you can copy/paste from your local directory, to \\\recalbox\share (for recalbox) or \\batocera\share (for batocera) or \\retropie (for retropie).
With Batocera the recovered files will be in the overlays recovery folder, then '\decorations\mybezels16-9\games\'
With Recalbox the recovered files will be in the overlays recovery folder, then '\overlays'
With Retropie the recovered files will be in the overlays recovery folder, then '\configs\'
You can know the name of the 'Core' of a system by opening with a text editor the file (for the megadrive) '\\retropie\configs\megadrive\content_history.lpl' which indicates the “core_name” used
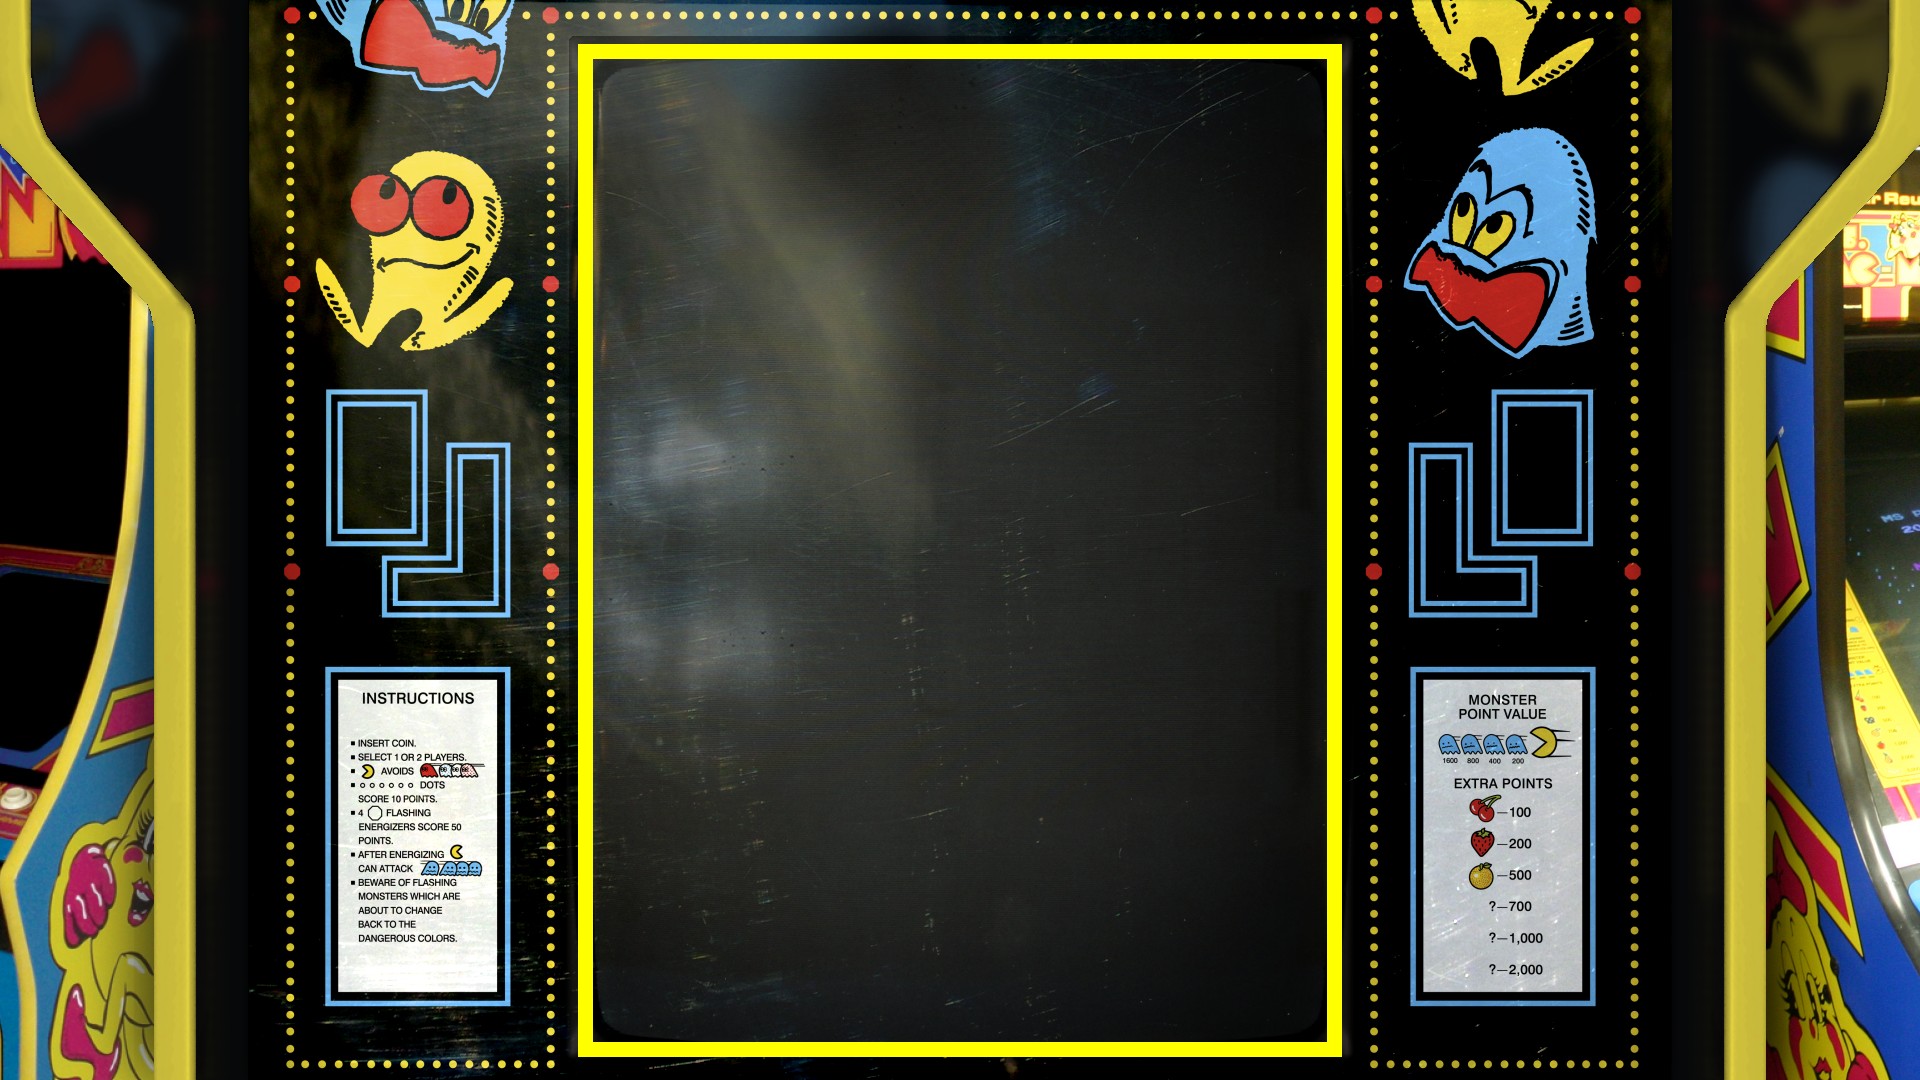
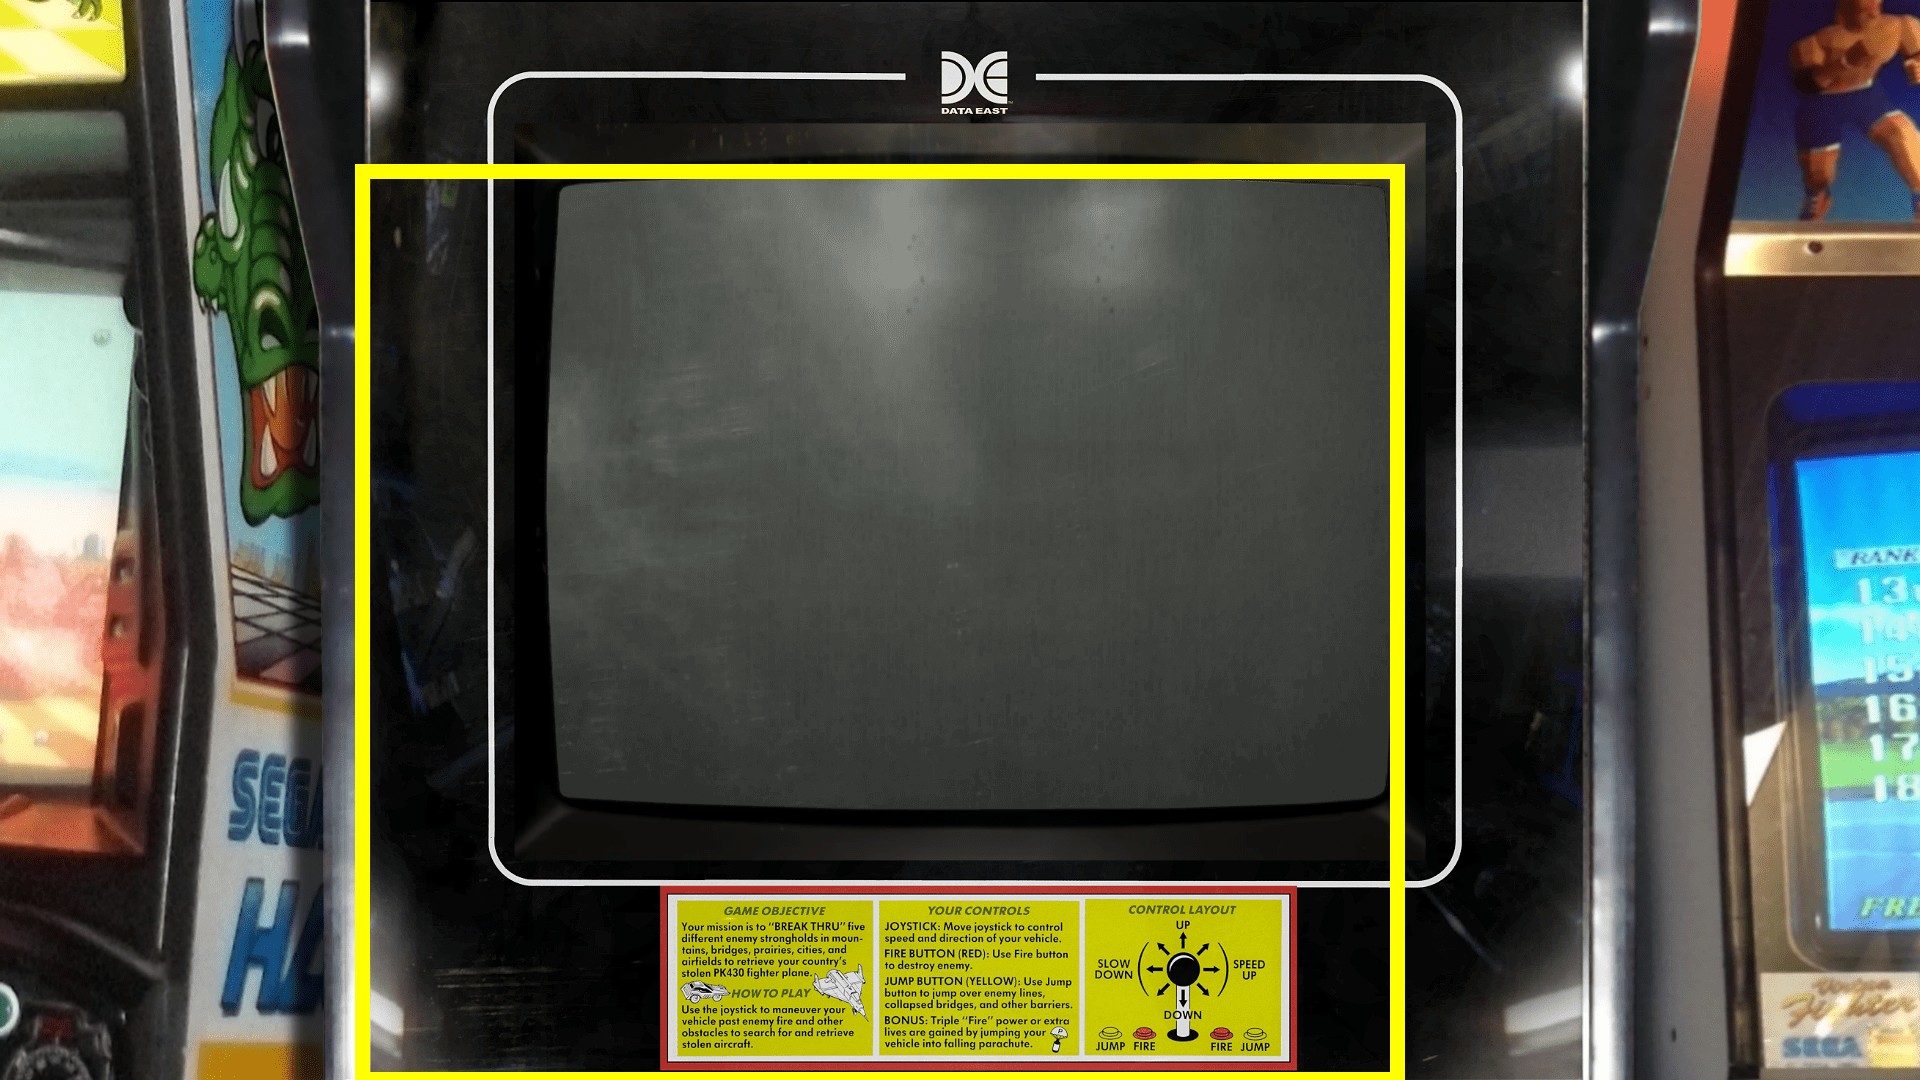
The 'Dev' checkbox saves an image of the overlay with a yellow frame corresponding to the coordinates found by ARRM. This makes it easy to detect coordinate errors and subsequently modify your configuration files or the overlay file (see 'Forcing the use of default overlays') This image is saved in the overlays storage directory in the subdirectory '\overlays_preview\games\%system%\'
The checkbox → 720: Convert 1080 overlays to 720 and change viewport coordinates accordingly.
Examples of preview file indicating in yellow the area found automatically by ARRM:
- Good contact details
- Wrong coordinates
Remarks
ARRM automatically detects the transparency areas of the overlay and automatically calculates the values to apply in the configuration files. However, if the overlay contains transparent / translucent pixels outside the desired area, this may cause errors in the coordinates. In this case, you will need to modify the coordinates in the configuration files manually or use a template file as explained above.
System overlays are available for most systems, but game overlays are not. Many consoles/computers do not yet have game overlays available. You can always create and offer them on the site Screenscraper
If you notice certain errors on overlays, all you have to do with an image editor (photofiltre for example) is to locate the transparency zone and apply the coordinates data in the appropriate configuration files, or modify the .png image and apply the 'Force the use of default overlays' procedure below.
The names of games for which no overlay was found are saved in the file '_missing_overlays_%SYSTEM%.txt' located in the chosen system directory.
Force the use of default overlays
If you have modified or created overlays (.png image), you can force ARRM to take them into account. All you have to do is place your overlay image in the overlays storage directory in the '\overlays_priority\' sub-directory. You will have to put your .png file in the directory with the name (system id) of the system if it is a system overlay, or the name of the rom file if it is a game overlay.
Example: 'mastersystem.png' (for a system) or 'Batman Forever Arcade.png' for a game whose file name would be 'Batman Forever Arcade.xxx'
Check the boxes corresponding to the Overlays, select the roms for which you have your own .png (in '\overlays_priority\') and click on the Screenscraper button. If a .png with the correct name is present, it will be considered.
Working Principles
Screen resolutions and overlays resolution
Overlay resolutions
The system and game overlays recovered by ARRM on Screenscraper are in 16/9 (the most common) and 4/3 format. the native resolutions of these overlays are:
- 4/3: 1024×768
- 16/9: 1920×1080
however, it is possible to convert via ARRM to other resolutions:
- 4/3 (1024×768) to 1280×1024
- 16:9 (1920×1080) to 1280×720
see ARRM software settings, images options
Display/Monitor Resolutions
it is possible to force the resolutions of your screens via the recalbox.conf or batocera.conf files located in the \\recalbox\share\system or \\batocera\share\system directory
Here are the parameters of the different modes that we encounter most often:
- DMT4: 640×480@60
- DMT 9: 800×600@60
- DMT 16: 1024×768@60
- DMT 35: 1280×1024@60
- DMT 57: 1680×1050@60
- 720p: CEA 4
- 1080p: CEA 16
Path settings file
the file %appdata%\Nexouille soft\arrm\database\overlays_path.txt contains the paths used when generating overlays. Here you can set the System and Game Overlay paths for Recalbox and Retropie. For Batocera, the paths are currently integrated into the application.
File Structure
Content :
# retropie
retropie_directory_input_overlay_game|/opt/retropie/configs/all/retroarch/overlay
retropie_directory_input_overlay_system|/opt/retropie/configs/all/retroarch/overlay

retropie_directory_cfg_system|\configs\
retropie_directory_overlay_system|\configs\all\retroarch\overlay\

retropie_directory_cfg_game|\configs\all\retroarch\config\
retropie_directory_overlay_game|\configs\all\retroarch\overlay


#recalbox
recalbox_directory_input_overlay_game|/recalbox/share/overlays
recalbox_directory_input_overlay_system|/recalbox/share/overlays

recalbox_directory_cfg_system|\overlays\
recalbox_directory_overlay_system|\overlays\

recalbox_directory_cfg_game|\overlays\
recalbox_directory_overlay_game|\overlays\
- recalbox_directory_input_overlay_game = corresponds to the path indicated in 'input_overlay' which will be added by ARRM in the config files for game overlays for Recalbox.
- recalbox_directory_input_overlay_system = corresponds to the path indicated in 'input_overlay' which will be added by ARRM in the config files for the system overlays for Recalbox.
- recalbox_directory_cfg_system = path where the main .cfg files for the system overlays for Recalbox will be stored.
- recalbox_directory_overlay_system = path where image .cfg files and overlay image files for systems for Recalbox will be stored.
- recalbox_directory_cfg_game = path where main .cfg files for game overlays for Recalbox will be stored.
- recalbox_directory_overlay_game = path where image .cfg files and overlay image files for games for Recalbox will be stored.
We find the same type of declaration for Retropie. For Batocera it is hard coded in the application since the path is unique: 'decorations'
For information, the paths contained in 'recalbox_directory_cfg_system' , 'recalbox_directory_overlay_system' , 'recalbox_directory_cfg_game' , 'recalbox_directory_overlay_game' will be created identically in the directory defined in 'Overlays directory'.
Example for Recalbox:
- if this 'Overlays directory' indicates '\\recalbox\share' the files will be created directly on your Recalbox.
- if this 'Overlays directory' indicates a local directory on your disk (for example 'c:\tempo'), then you will have to copy c:\tempo\system and c: \tempo\overlays on '\\recalbox\share'
Example for Retropie
- if this 'Overlays Directory' indicates '\\retropie' the files will be created directly on your Retropie.
- if this 'Overlays directory' indicates a local directory on your disk (for example 'c:\tempo'), then you will have to copy c:\tempo\configs on '\\retropy'
Example for Batocera
- if this 'Overlays directory' indicates '\\batocera\share' the files will be created directly on your Batocera.
- if this 'Overlays directory' indicates a local directory of your disk (for example 'c:\tempo'), then it will be necessary to copy c:\tempo\decorations on '\\batocera\share'
Recalbox and overlays
System Overlays
Recalbox uses 3 different files to display an overlay:
Example with the Megadrive/Genesis:
1st file: \\recalbox\share\overlays\megadrive\megadrive.cfg
Content of this file:
# output resolution
video_fullscreen_x = "1920"
video_fullscreen_y = "1080"

# aspect ratio
aspect_ratio_index = "23"
video_force_aspect = "true"
video_scale_integer = "false"
video_smooth = "false"

video_font_size = "28.000000"
video_message_color="ffff00"

# common overlay parameters
input_overlay_hide_in_menu = "false"
input_overlay_en_relookedable = "true"
input_overlay_opacity = "1.000000"
input_overlay_scale = "1.000000"

#shader
video_shader_en_relookedable = "true"

custom_viewport_x = "235"
custom_viewport_y = "4"
custom_viewport_width = "1448"
custom_viewport_height = "1076"

input_overlay = "/recalbox/share/overlays/megadrive/16-9/megadrive_overlay.cfg"
2nd file: \\recalbox\share\overlays\megadrive\16-9\megadrive_overlay.cfg
content of this file:
overlays = 1
overlay0_full_screen=true
overlay0_descs = 0
overlay0_overlay = "megadrive.png"
3rd file (overlay image): \\recalbox\share\overlays\megadrive\16-9\megadrive.png
Game Overlays
Recalbox uses 3 different files to display an overlay:
Example with the game 'Alex Kidd in the Enchanted Castle (Europe).zip' on Megadrive/Genesis:
1st file: \\recalbox\share\overlays\megadrive\Alex Kidd in the Enchanted Castle (Europe).zip.cfg
Content of this file:
# output resolution
video_fullscreen_x = "1920"
video_fullscreen_y = "1080"

# aspect ratio
aspect_ratio_index = "23"
video_force_aspect = "true"
video_scale_integer = "false"
video_smooth = "false"

video_font_size = "28.000000"
video_message_color="ffff00"

# common overlay parameters
input_overlay_hide_in_menu = "false"
input_overlay_en_relookedable = "true"
input_overlay_opacity = "1.000000"
input_overlay_scale = "1.000000"

#shader
video_shader_en_relookedable = "true"

custom_viewport_x = "235"
custom_viewport_y = "4"
custom_viewport_width = "1448"
custom_viewport_height = "1076"

input_overlay = "/recalbox/share/overlays/megadrive/16-9/Alex Kidd in the Enchanted Castle (Europe).cfg"
2nd file: \\recalbox\share\overlays\megadrive\16-9\Alex Kidd in the Enchanted Castle (Europe).cfg
content of this file:
overlays = 1
overlay0_full_screen=true
overlay0_descs = 0
overlay0_overlay = "Alex Kidd in the Enchanted Castle (Europe).png"
3rd file (overlay image): \\recalbox\share\overlays\megadrive\16-9\Alex Kidd in the Enchanted Castle (Europe).png
How ARRM works in creating overlays for Recalbox
Creation of System Overlays with ARRM for Recalbox
To create configuration files, ARRM uses template files located in the directory: '%appdata%\Nexouille soft\arrm\ressources\overlays\systems_autogen\'. These files are deliberately incomplete, because ARRM will complete them by adding the viewports (game display coordinates in the overlay).
Warning the following lines are created automatically depending on the resolution of the recovered bezel/overlay:
video_fullscreen_x = "1920"
video_fullscreen_y = "1080"
The .zip.cfg files (you will certainly have to modify the content of these files according to your needs). These files correspond in our example above to the 1st file: \\recalbox\share\system\configs\retroarch\megadrive.cfg
- model_bezel_systems_recalbox_zip_cfg_4-3.txt
- model_bezel_systems_recalbox_zip_cfg_16-9.txt
Each file corresponds to a different screen ratio (4/3; 16/9) I you advise to take the 16/9 ratio because it offers many more overlays than the other ratios.
The .cfg files (it is currently not necessary to modify it). This file corresponds in our example above to the 2nd file: \\recalbox\share\system\configs\retroarch\overlays\16-9\megadrive.cfg
- model_bezel_systems_recalbox_cfg.txt
These files are enforced for all systems by ARRM.
ARRM automatically detects the transparency areas of the overlay and automatically calculates the following values which it applies in the .zip.cfg file:
- custom_viewport_x
- custom_viewport_y
- custom_viewport_width
- custom_viewport_height
as well as
- video_fullscreen_x
- video_fullscreen_y
However, you can apply a particular setting for each system by copying the pair of model files (model_bezel_systems_recalbox_cfg.txt, model_bezel_systems_recalbox_zip_cfg_16-9.txt) into the directory of the desired systems and modifying them according to your needs. These files are located in this directory: '%appdata%\Nexouille soft\arrm\resources\overlays\systems\' It's up to you to indicate the coordinates in the resolution of the overlay.
- model_bezel_systems_recalbox_zip_cfg_4-3.txt
- model_bezel_systems_recalbox_zip_cfg_16-9.txt
- model_bezel_systems_recalbox_cfg.txt
Creation of Overlays by Games with ARRM for Recalbox
To create configuration files, ARRM uses template files located in the directory: '%appdata%\Nexouille soft\arrm\ressources\overlays\games_autogen\'. These files are deliberately incomplete, because ARRM will complete them by adding the viewports (game display coordinates in the overlay).
the following lines are created automatically according to the resolution of the retrieved bezel/overlay:
video_fullscreen_x = "1920"
video_fullscreen_y = "1080"
The .zip.cfg files (you will certainly have to modify the content of these files according to your needs). These files correspond in our example above to the 1st file: \\recalbox\share\overlays\megadrive\Alex Kidd in the Enchanted Castle (Europe).zip.cfg
- model_bezel_games_recalbox_zip_cfg_4-3.txt
- model_bezel_games_recalbox_zip_cfg_16-9.txt
Each file corresponds to a different screen ratio (4/3; 16/9) I advise you to take the 16/9 ratio because it offers a lot more overlays than the other ratios.
The .cfg files (it is currently not necessary to modify it). This file corresponds in our example above to the 2nd file: \\recalbox\share\system\configs\retroarch\overlays\16-9\megadrive.cfg
- model_bezel_systems_recalbox_cfg.txt
These files are enforced for all systems by ARRM.
ARRM automatically detects the transparency areas of the overlay and automatically calculates the following values which it applies in the .zip.cfg file:
- custom_viewport_x
- custom_viewport_y
- custom_viewport_width
- custom_viewport_height
as well as
- video_fullscreen_x
- video_fullscreen_y
However you can apply a particular setting for the games of each system by copying the couple of model files (model_bezel_games_recalbox_cfg.txt, model_bezel_games_recalbox_zip_cfg_16-9.txt), in the directory of the desired systems and modifying them according to your needs. These files are located in this directory: '%appdata%\Nexouille soft\arrm\ressources\overlays\games\' It's up to you to indicate the coordinates in the resolution of the overlay.
- model_bezel_games_recalbox_zip_cfg_4-3.txt
- model_bezel_games_recalbox_zip_cfg_16-9.txt
- model_bezel_games_recalbox_cfg.txt
Retropie and overlays
System Overlays
Retropie uses 3 different files to display an overlay:
Example with the Megadrive/Genesis:
1st file: \\retropie\configs\megadrive\retroarch.cfg
Content of this file:
# output resolution
video_fullscreen_x = "1920"
video_fullscreen_y = "1080"

# aspect ratio
aspect_ratio_index = "23"
video_force_aspect = "true"
video_scale_integer = "false"
video_smooth = "false"

video_font_size = "28.000000"
video_message_color="ffff00"


# common overlay parameters
input_overlay_hide_in_menu = "false"
input_overlay_en_relookedable = "true"
input_overlay_opacity = "1.000000"
input_overlay_scale = "1.000000"

#shader
video_shader_en_relookedable = "true"

# Auto-generated by ARRM
custom_viewport_x = "239"
custom_viewport_y = "0"
custom_viewport_width = "1441"
custom_viewport_height = "1079"


input_overlay = "/opt/retropie/configs/all/retroarch/overlay/16-9/megadrive.cfg"

input_remapping_directory = "/opt/retropie/configs/megadrive/"

#include "/opt/retropie/configs/all/retroarch.cfg"
2nd file: \\retropie\configs\all\retroarch\overlay\16-9\megadrive.cfg
content of this file:
overlays = 1
overlay0_full_screen=true
overlay0_descs = 0
overlay0_overlay = "megadrive.png"
3rd file (overlay image): \\retropie\configs\all\retroarch\overlay\16-9\megadrive.png
Game Overlays
Retropie uses 3 different files to display an overlay:
Example with the game 'Aladdin (USA).zip' on Megadrive/Genesis:
1st file: \\retropie\configs\all\retroarch\config\Genesis Plus GX\Aladdin (USA).cfg
You notice that the system name 'megadrive' is replaced by 'Genesis Plus GX' which corresponds to the 'Core' used for this system. You can know the name of the 'Core' by opening with a text editor the file '\\retropie\configs\megadrive\content_history.lpl' which indicates the “core_name” used. Extract:
{
   "version": "1.0",
   "items": [
     {
       "path": "/home/pi/RetroPie/roms/megadrive/Alien Soldier (Europe).md",
       "label": "",
       "core_path": "/opt/retropie/libretrocores/lr-genesis-plus-gx/genesis_plus_gx_libretro.so",
       "core_name": "Genesis Plus GX",
       "crc32": "",
       "db_name": ""
     },
Contents of this file \\retropie\configs\all\retroarch\config\Genesis Plus GX\Aladdin (USA).cfg
# output resolution
video_fullscreen_x = "1920"
video_fullscreen_y = "1080"

# aspect ratio
#aspect_ratio_index="23"
video_force_aspect = "true"
video_scale_integer = "false"
video_smooth = "false"

video_font_size = "28.000000"
video_message_color="ffff00"


# common overlay parameters
input_overlay_hide_in_menu = "false"
input_overlay_en_relookedable = "true"
input_overlay_opacity = "1.000000"
input_overlay_scale = "1.000000"

#shader
video_shader_en_relookedable = "true"

custom_viewport_x = "244"
custom_viewport_y = "3"
custom_viewport_width = "1431"
custom_viewport_height = "1072"


input_overlay = "/opt/retropie/configs/all/retroarch/overlay/megadrive/16-9/Aladdin (USA).cfg"
2nd file: \\retropie\configs\all\retroarch\overlay\megadrive\16-9\Aladdin (USA).cfg
content of this file:
overlays = 1
overlay0_full_screen=true
overlay0_descs = 0
overlay0_overlay = "Aladdin (USA).png"
3rd file (overlay image): \\retropie\configs\all\retroarch\overlay\megadrive\16-9\Aladdin (USA).png
How ARRM works in creating overlays for Retropie
Creating System Overlays with ARRM for Retropie
To create configuration files, ARRM uses template files located in the directory: '%appdata%\Nexouille soft\arrm\ressources\overlays\systems_autogen\'. These files are deliberately incomplete, because ARRM will complete them by adding the viewports (game display coordinates in the overlay).
Warning the following lines are created automatically depending on the resolution of the recovered bezel/overlay:
video_fullscreen_x = "1920"
video_fullscreen_y = "1080"
The .zip.cfg files (you will certainly have to modify the content of these files according to your needs). These files correspond in our example above to the 1st file: \\retropie\configs\megadrive\retroarch.cfg
- model_bezel_systems_retropie_zip_cfg_4-3.txt
- model_bezel_systems_retropie_zip_cfg_16-9.txt
Each file corresponds to a different screen ratio (4/3; 16/9) I advise you to take the 16/9 ratio because it offers a lot more overlays than the other ratios.
The .cfg files (it is currently not necessary to modify it). This file corresponds in our example above to the 2nd file: \\retropie\configs\all\retroarch\overlay\16-9\megadrive.cfg
- model_bezel_systems_retropie_cfg.txt
These files are enforced for all systems by ARRM.
ARRM automatically detects areas of transparency in the overlay and automatically calculates the following values which it applies in the retroarch.zip file:
- custom_viewport_x
- custom_viewport_y
- custom_viewport_width
- custom_viewport_height
as well as :
- video_fullscreen_x
- video_fullscreen_y
However, you can apply a particular setting for each system by copying the couple of model files (model_bezel_systems_retropie_cfg.txt, model_bezel_systems_retropie_zip_cfg_16-9.txt) into the directory of the desired systems and modifying them according to your needs. These files are located in this directory: '%appdata%\Nexouille soft\arrm\resources\overlays\systems\' It's up to you to indicate the coordinates in the resolution of the overlay.
- model_bezel_systems_retropie_zip_cfg_4-3.txt
- model_bezel_systems_retropie_zip_cfg_16-9.txt
- model_bezel_systems_retropie_cfg.txt
Creation of Overlays by Games with ARRM for Retropie
To create configuration files, ARRM uses template files located in the directory: '%appdata%\Nexouille soft\arrm\ressources\overlays\games_autogen\'. These files are voluntarily incomplete, because it is ARRM which will take care of completing them and n adding viewports (game display coordinates in the overlay).
Warning the following lines are created automatically depending on the resolution of the recovered bezel/overlay:
video_fullscreen_x = "1920"
video_fullscreen_y = "1080"
The .zip.cfg files (you will certainly have to modify the content of these files according to your needs). These files correspond in our example above to the 1st file: \\retropie\configs\all\retroarch\config\Genesis Plus GX\Aladdin (USA).cfg
- model_bezel_games_retropie_zip_cfg_4-3.txt
- model_bezel_games_retropie_zip_cfg_16-9.txt
Each file corresponds to a different screen ratio (4/3; 16/9) I advise you to take the 16/9 ratio because it offers a lot more overlays than the other ratios.
The .cfg files (it is currently not necessary to modify it). This file corresponds in our example above to the 2nd file: \\retropie\configs\all\retroarch\overlay\megadrive\16-9\Aladdin (USA).cfg
- model_bezel_systems_retropie_cfg.txt
These files are enforced for all systems by ARRM.
ARRM automatically detects areas of transparency in the overlay and automatically calculates the following values which it applies in the .cfg file:
- custom_viewport_x
- custom_viewport_y
- custom_viewport_width
- custom_viewport_height
as well as :
- video_fullscreen_x
- video_fullscreen_y
However, you can apply a particular setting to the games of each system by copying the couple of model files (model_bezel_games_retropie_cfg.txt, model_bezel_games_retropie_zip_cfg_16-9.txt) into the directory of the desired systems and modifying them according to your needs. These files are located in this directory: '%appdata%\Nexouille soft\arrm\ressources\overlays\games\' It's up to you to indicate the coordinates in the resolution of the overlay.
- model_bezel_games_retropie_zip_cfg_4-3.txt
- model_bezel_games_retropie_zip_cfg_16-9.txt
- model_bezel_games_retropie_cfg.txt
Batocera and overlays
System Overlays
Batocera is a little simpler in its management of overlays, it only uses 2 different files to display an overlay:
Example with the Megadrive/Genesis:
1st file: \\batocera\share\decorations\mybezels\systems\megadrive.info
Content of this file:
{
  "width":1920,
  "height":1080,
  "top":2,
  "left":241,
  "bottom":1,
  "right":243,
  "opacity":0.7000000,
  "messagex":0.220000,
  "messagey":0.120000
}
2nd file (overlay image): \\batocera\share\decorations\mybezels\systems\megadrive.png
Games Overlays
Batocera uses 2 different files to display an overlay:
Example with the game 'Alex Kidd in the Enchanted Castle (Europe).zip' on Megadrive/Genesis:
1st file: \\batocera\share\decorations\mybezels\games\Alex Kidd in the Enchanted Castle (Europe).info
Content of this file:
{
  "width":1920,
  "height":1080,
  "top":2,
  "left":241,
  "bottom":1,
  "right":243,
  "opacity":0.7000000,
  "messagex":0.220000,
  "messagey":0.120000
}
2nd file (overlay image): \\batocera\share\decorations\mybezels\games\Alex Kidd in the Enchanted Castle (Europe).png
How ARRM works in creating overlays for Batocera
Creating System Overlays with ARRM for Batocera
To create configuration files, ARRM uses template files located in the directory: '%appdata%\Nexouille soft\arrm\ressources\overlays\systems_autogen\'. These files are deliberately incomplete, because ARRM will complete them by adding the viewports (game display coordinates in the overlay).
Warning the following lines are created automatically depending on the resolution of the recovered bezel/overlay:
  "width":1920,
  "height":1080,
The .info files (you will certainly have to modify the content of these files according to your needs). These files correspond in our example above to the 1st file: \\batocera\share\decorations\mybezels\systems\megadrive.info
- model_bezel_systems_batocera_4-3.txt
- model_bezel_systems_batocera_16-9.txt
Each file corresponds to a different screen ratio (4/3; 16/9) I advise you to take the 16/9 ratio because it offers a lot more overlays than the other ratios.
This file will be enforced for all systems by ARRM.
ARRM automatically detects areas of transparency in the overlay and automatically calculates the following values which it applies in the .info file:
- “top”:
- “left”
- “bottom”
- “right”
as well as :
- “width”
- “height”
However you can apply a particular setting for each system by copying the model file ('model_bezel_systems_batocera_16-9.txt' or 'model_bezel_systems_batocera_4-3.txt'), in the roms directory systems you want and modify them to suit your needs. These model files are located in this directory: '%appdata%\Nexouille soft\arrm\resources\overlays\systems\' It's up to you to indicate the coordinates in the resolution of the overlay.
- model_bezel_systems_batocera_4-3.txt
- model_bezel_systems_batocera_16-9.txt
Creation of Overlays by Games with ARRM for Batocera
To create configuration files, ARRM uses template files located in the directory: '%appdata%\Nexouille soft\arrm\ressources\overlays\games_autogen\'. These files are deliberately incomplete, because ARRM will complete them by adding the viewports (game display coordinates in the overlay).
Warning the following lines are created automatically depending on the resolution of the recovered bezel/overlay:
  "width":1920,
  "height":1080,
The .info files (you will certainly have to modify the content of these files according to your needs). These files correspond in our example above to the 1st file: \\batocera\share\decorations\mybezels\games\Alex Kidd in the Enchanted Castle (Europe).info
- model_bezel_games_batocera_4-3.txt
- model_bezel_games_batocera_16-9.txt
Each file corresponds to a different screen ratio (4/3; 16/9) I advise you to take the 16/9 ratio because it offers a lot more overlays than the other ratios.
This file will be enforced for all systems by ARRM.
ARRM automatically detects areas of transparency in the overlay and automatically calculates the following values which it applies in the .info file:
- “top”:
- “left”
- “bottom”
- “right”
as well as :
- “width”
- “height”
However you can apply a particular setting for the games of each system by copying the model file ('model_bezel_games_batocera_16-9.txt' or 'model_bezel_games_batocera_4-3.txt'), in the roms directory of the desired system and modify them according to your needs. These files are located in this directory: '%appdata%\Nexouille soft\arrm\ressources\overlays\games\' It's up to you to indicate the coordinates in the resolution of the overlay.
- model_bezel_games_batocera_4-3.txt
- model_bezel_games_batocera_16-9.txt

