Table des matières
Generate Custom Marquees
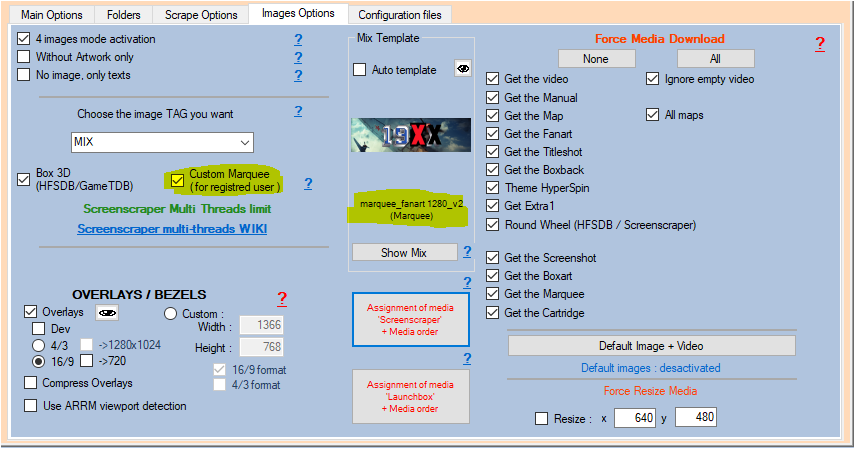
If this Custom Marquee option is not unchecked, when scraping with template mix, the template mix will not be applied and the image will not be generated
Since version 1914 Beta 10, it is now possible to generate Custom Marquee. (request from Bob Morane)
A custom marquee is based on one of these two specific templates:
- template marquee_fanart 1280_v2 (custom with Wheel tag) → uses tag Wheel
- template marquee_fanart 1280_v2_marquee (custom with Marquee tag) → uses tag Marquee
- template marquee fanart round (Custom with Wheel tag) → uses tag Wheel
- template marquee fanart round (Custom with Marquee tag) → uses tag Marquee
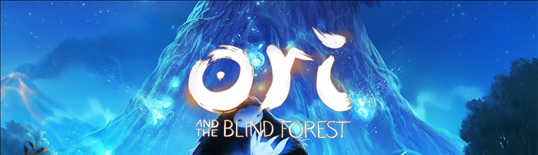
It consists of the upper portion of the fanart or screenshot of the game on which the Wheel/logo is applied
Here is an overview of some Custom Marquee generated by ARRM:
- with the template marquee_fanart 1280_v2 (custom with Wheel tag)


- with the template marquee fanart round (Custom with Marquee tag)


Example of Custom Marquees in a theme proposed by Bob Morane:
The procedure consists in applying a specific template which will generate a custom marquee file with the suffix specified in the template in the tag <crop_filename_suffix> (here: -marquee_cropped)
Example: aliensu2-marquee_cropped.png which will be saved in the directory dedicated to wheels.
This custom marquee will be saved in the Theme Builder folder defined in the Settings Folders tab
The template 'marquee_fanart 1280_v2 (custom with Wheel tag)'
Use one of these keywords to easily find the template in the Templates download module : Special , Marquee , Custom Marquee
This marque produces Custom Marquees of this type:
Setting the 'marquee_fanart 1280_v2 (custom with Wheel tag)'
The template used is marquee_fanart 1280_v2 (custom with Wheel tag) whose file is located in %appdata%\Nexouille Soft\ressources\templates\marquee_fanart _1280_v2\mix_marquee_fanart_1280_v2.xml
Here is what it contains:
<?xml version="1.0" encoding="utf-8" ?>
<data>
    <infos>
        <author>Nexusone13</author>
        <description>Marquee from Fanart/Screenshot for Bob Morane
WARNING:
This template doesn't create Mix in image folder
It creates marquee image with suffix '-marquee_cropped'
from fanart/screenshot + title in wheels folder.
Used for create customized marquees.
Tick the 'Custom Marquee' checkbox in 'Images Options' Tab.
V2 better handles the cropping of steam fanarts.
        </description>
    </infos>
    <element>
        <name>marquee_fanart 1280_v2 (custom with Wheel tag)</name>
        <sample>marquee_fanart_v2.png</sample>

		<box>false</box>
		<marquee>true</marquee>
		<marquee3_align>true</marquee3_align>
		<marquee_align>true</marquee_align>

        <add_black_borders>false</add_black_borders>

		<!-- Here you define the size of the final custom marquee image,
		before a possible resize.
		All coordinates defined in other tags are relative to this size	-->

        <custom_background_width>1280</custom_background_width>
        <custom_background_height>720</custom_background_height>

		<!-- even if you don't use a screenshot in your template,
		it is necessary to leave the coordinates. Put the same as the fanart.
		On the other hand you can remove the reference to the screenshot in the layer -->

		<custom_screenshot_x>0</custom_screenshot_x>
        <custom_screenshot_y>0</custom_screenshot_y>
        <custom_screenshot_width>1280</custom_screenshot_width>
        <custom_screenshot_height>720</custom_screenshot_height>

        <custom_fanart_x>0</custom_fanart_x>
        <custom_fanart_y>0</custom_fanart_y>
        <custom_fanart_width>1280</custom_fanart_width>
        <custom_fanart_height>720</custom_fanart_height>

		<custom_marquee_x>314</custom_marquee_x>
        <custom_marquee_y>58</custom_marquee_y>
        <custom_marquee_width>652</custom_marquee_width>
        <custom_marquee_height>295</custom_marquee_height>


		<!-- <layer1>background.png</layer1> -->

		<!-- Image cropping works only for custom marquee.
		     You have to check the  'Cutom Marquee' checkbox
			 You must have a wheel and a fanart and/or a screenshot already present
			 Use 'Recompose image' button on selected Roms.
			 It will produce a custom marquee image with the suffix : -marquee_cropped.png
			 stored in the wheels directory.
			 It will not change the mix already present -->

		<!-- <crop>x;y;width;height</crop> -->

		<crop>0;0;1280;413</crop>

		<!-- crop_filename_suffix : suffix add to the image filename -->

		<crop_filename_suffix>-marquee_cropped</crop_filename_suffix>

        <!-- crop_mask_image : Mask applied on Mix.
		name of the Mask png file in the template directory
		It must have the same size of the crop image (here 1280x368)
		The transparency area in the mask must be the color specified in <crop_mask_image_transparent_color>. See the example in the template directory
		If you are using a mask image, you should add <layer1>background.png</layer1> for better visual results -->

		<!-- <crop_mask_image>mask_image_ellipsis_1280.png</crop_mask_image> -->
		<!-- <crop_mask_image>mask_image_arcade_1280.png</crop_mask_image> -->
		<!-- <crop_mask_image>mask_image_blast_1280.png</crop_mask_image> -->
		<!-- <crop_mask_image>mask_image_carbon_1280.png</crop_mask_image> -->

		<!-- crop_mask_image_transparent_color used to set the color used for transparency : alpha,red,green,blue  . Leave alpha to 0 -->
		<!-- value 0;235;114;165 is a kind of pink that will be use to make transparency. -->

		<crop_mask_image_transparent_color>0;235;114;165</crop_mask_image_transparent_color>

		<layer2>screenshot</layer2>

		<item fanart="steam">
				<custom_marquee_x>314</custom_marquee_x>
				<custom_marquee_y>212</custom_marquee_y>
				<custom_marquee_width>652</custom_marquee_width>
				<custom_marquee_height>295</custom_marquee_height>

				<crop>0;154;1280;413</crop>

				<layer2></layer2>
		</item>

		<!-- You can start with a much bigger image, then at the end of the
		process you can ask to reduce image with the <rezize> tag -->

		<!-- <resize width = "538" height = "174" /> -->

        <layer3>fanart</layer3>
		<layer4>marquee</layer4>

		<category>Special,Marquee,Wheel,Custom Marquee</category>
</element>
</data>
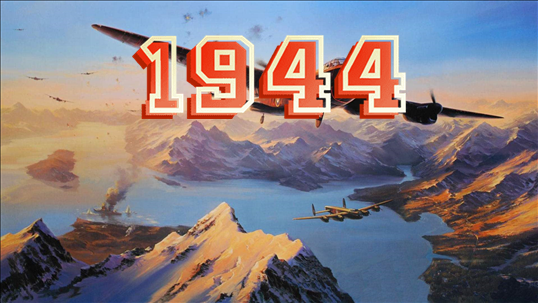
This template will first use a screenshot on the <layer2>
If a fanart exists it will replace the screenshot via the <layer3>
The generated Mix will have a size of 1280×720 pixels (<custom background> tag)
The screenshot / fanart will occupy this entire surface (tag <custom_screenshot_*> and <custom_fanart_*>)
The Marquee in <layer4> will be positioned
at coordinates (314,58) and will have a size of 652×295 pixels (tag <custom_marquee_*>)
<item fanart="steam">
<custom_marquee_x>314</custom_marquee_x>
<custom_marquee_y>212</custom_marquee_y>
<custom_marquee_width>652</custom_marquee_width>
<custom_marquee_height>295</custom_marquee_height>

<crop>0;154;1280;413</crop>

<layer2></layer2>
</item>
We then obtain this Mix:
The <crop> tag is used to indicate the coordinates of the area that you want to keep. Here :
<crop>0;0;1280;413</crop> which corresponds to <crop>x;y;width;height</crop>
Which give : Initial coordinate zone (0,0) for a size of 1280×413 pixels
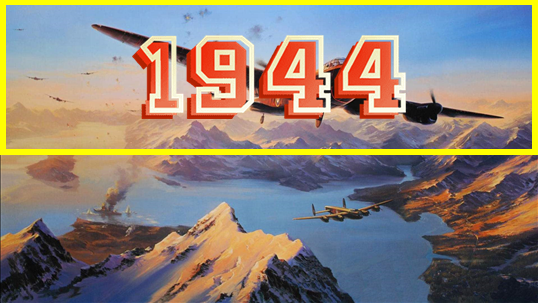
Which gives after “cropping”:

The custom marquee will be saved in the Wheels directory with the suffix present in the tag <crop_filename_suffix>-marquee_cropped</crop_filename_suffix>
It is better, for a question of quality, to work on a larger Mix and to resize it via this tag.
Using a mask with 'marquee_fanart 1280_v2' template
Since version 1914 Beta 13, it is possible to apply a mask on this custom marquee
This mask consists of an image in .png format with a transparency zone. The parts that will be masked must be of the color indicated in <crop_mask_image_transparent_color> (here: 0;235;114;165) (since ARRM version 2.0.3.1 beta 2). As in the example below.

It is located in the template directory.
Its name is indicated in the tag <crop_mask_image> , here mask_image_ellipsis_1280.png
You get this after applying the mask:

Another example with this mask mask_image_carbon_1280.png
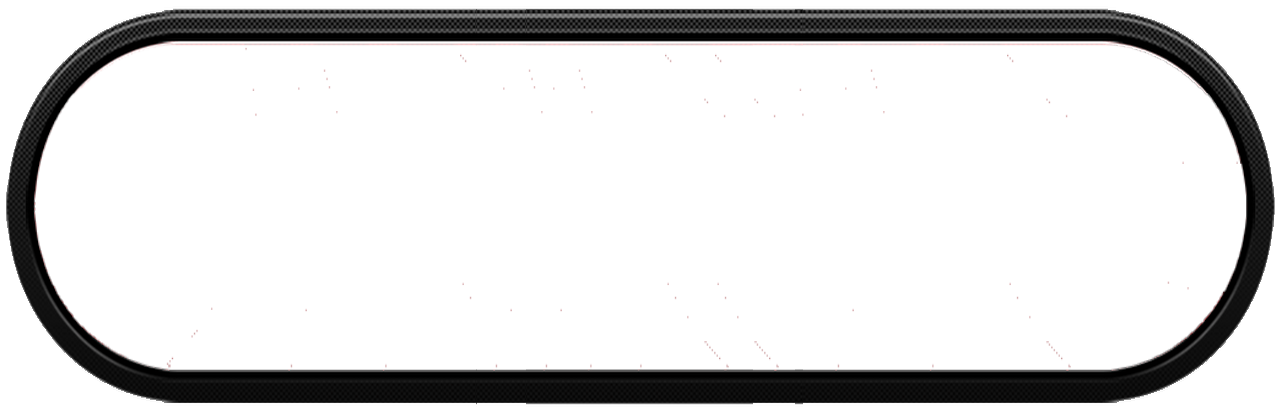
You get this after applying the mask:

Another example with this mask where I removed <layer4>marquee</layer4>

You get this after applying the mask:

Here :
<resize width=“538” height=“173” />
The template 'marquee fanart round (Custom with Wheel tag)'
Use one of these keywords to easily find the template in the Templates download module : Special , Marquee , Custom Marquee
This template produces Custom Marquees of this type:
Configuration of the template 'marquee fanart round (Custom Marquee)'
The template used is marquee fanart round (Custom Marquee) whose file is located in %appdata%\Nexouille Soft\resources\templates\marquee_fanart _round\mix_marquee_fanart_round.xml
Here is what it contains:
<?xml version="1.0" encoding="utf-8" ?>
<data>
    <infos>
        <author>Nexusone13</author>
        <description>Marquee Round from Fanart/Screenshot for Bob Morane
WARNING:
This template doesn't create Mix in image folder
It creates marquee image with suffix '-marquee_cropped'
from fanart/screenshot + title in wheels folder.
Used for create customized marquees.
Tick the 'Custom Marquee' checkbox in 'Images Options' Tab.
V2 better handles the cropping of steam fanarts.
You need ARRM v 2.0.3.1
        </description>
    </infos>
    <element>
        <name>marquee fanart round (Custom with Wheel tag)</name>
        <sample>mix_marquee_fanart_round.png</sample>

		<box>false</box>
        <marquee>true</marquee>
		<marquee_align>true</marquee_align>
		<marquee3_align>true</marquee3_align>

        <add_black_borders>false</add_black_borders>

		<!-- Here you define the size of the final custom marquee image,
		before a possible resize.
		All coordinates defined in other tags are relative to this size	-->

        <custom_background_width>1133</custom_background_width>
        <custom_background_height>1133</custom_background_height>

		<!-- even if you don't use a screenshot in your template,
		it is necessary to leave the coordinates. Put the same as the fanart.
		On the other hand you can remove the reference to the screenshot in the layer -->

		<custom_screenshot_x>0</custom_screenshot_x>
        <custom_screenshot_y>0</custom_screenshot_y>
        <custom_screenshot_width>1133</custom_screenshot_width>
        <custom_screenshot_height>1133</custom_screenshot_height>

		<custom_fanart_x>0</custom_fanart_x>
		<custom_fanart_y>0</custom_fanart_y>
		<custom_fanart_width>1133</custom_fanart_width>
		<custom_fanart_height>1133</custom_fanart_height>

		<custom_marquee_x>28</custom_marquee_x>
        <custom_marquee_y>714</custom_marquee_y>
        <custom_marquee_width>1090</custom_marquee_width>
        <custom_marquee_height>402</custom_marquee_height>


		<layer1>background.png</layer1>

		<!-- Image cropping works only for custom marquee.
		     You have to check the  'Cutom Marquee' checkbox
			 You must have a wheel and a fanart and/or a screenshot already present
			 Use 'Recompose image' button on selected Roms.
			 It will produce a custom marquee image with the suffix : -marquee_cropped.png
			 stored in the wheels directory.
			 It will not change the mix already present -->

		<!-- <crop>x;y;width;height</crop> -->

		<crop>0;0;1133;1133</crop>

		<!-- crop_filename_suffix : suffix add to the image filename -->

		<crop_filename_suffix>-marquee_cropped</crop_filename_suffix>

		<!-- <layer1>background.png</layer1> -->

		<!-- <layer1>background.png</layer1> -->

		<!-- crop_mask_image : Mask applied on Mix.
		name of the Mask png file in the template directory
		It must have the same size of the crop image (here 1280x368)
		The transparency area in the mask must be the color specified in <crop_mask_image_transparent_color>. See the example in the template directory
		If you are using a mask image, you should add <layer1>background.png</layer1> for better visual results -->

		<!-- <crop_mask_image>mask_image_ellipsis_1280.png</crop_mask_image> -->
		<!-- <crop_mask_image>mask_image_arcade_1280.png</crop_mask_image> -->
		<!-- <crop_mask_image>mask_image_blast_1280.png</crop_mask_image> -->
		<!-- <crop_mask_image>mask_image_carbon_1280.png</crop_mask_image> -->

		<crop_mask_image>mask_wheel_vince_round.png</crop_mask_image>

		<!-- crop_mask_image_transparent_color used to set the color used for transparency : alpha,red,green,blue  . Leave alpha to 0 -->
		<!-- value 0;235;114;165 is a kind of pink that will be use to make transparency. -->

		<crop_mask_image_transparent_color>0;235;114;165</crop_mask_image_transparent_color>

		<!-- displaying screenshot first on layer2 , if fanat exists screenshotst will be overwritten by fanat on a higher layer (here layer4) -->

		<layer2>screenshot</layer2>

		<item fanart="steam">

			<custom_fanart_x>-1532</custom_fanart_x>
			<custom_fanart_y>68</custom_fanart_y>
			<custom_fanart_width>3112</custom_fanart_width>
			<custom_fanart_height>1005</custom_fanart_height>

			<layer2></layer2>
		</item>

		<!-- You can start with a much bigger image, then at the end of the
		process you can ask to reduce image with the <rezize> tag -->

		<!-- <resize width = "538" height = "174" /> -->

        <layer4>fanart</layer4>

		<!-- so that the marquee overflows the circle, you must indicate "marquee" in the <layer15> -->

		<layer15>marquee</layer15>


	<category>Special,Marquee,Wheel,Custom Marquee</category>
</element>
</data>
This template will first use a screenshot on the <layer2>
If a fanart exists it will replace the screenshot via the <layer3>
The generated Mix will have a size of 1133×1133 pixels (tag <custom background>)
The screenshot / fanart will occupy this entire surface (tag <custom_screenshot_*> and <custom_fanart_*>)
The Marquee in <layer15> will be positioned
at coordinates (28,714) and will have a size of 1090×402 pixels (tag <custom_marquee_*>)
<item fanart="steam">
 <custom_fanart_x>-1532</custom_fanart_x>
 <custom_fanart_y>68</custom_fanart_y>
 <custom_fanart_width>3112</custom_fanart_width>
 <custom_fanart_height>1005</custom_fanart_height>

 <layer2></layer2>
</item>
We then obtain this Mix:
The <crop> tag allows you to indicate the coordinates of the area you want to keep. Here:
<crop>0;0;1133;1133</crop> which corresponds to <crop>x;y;width;height</crop>
Which gives: Initial coordinate zone (0,0) for a size of 1133×1133 pixels
The custom marquee will be saved in the Wheels directory with the suffix present in the <crop_filename_suffix>-marquee_cropped</crop_filename_suffix> tag
<important note>The <resize width = “538” height = “173” /> tag allows you to resize the final custom marquee to the dimension 538×155
For quality reasons, it is preferable to work on a larger Mix and resize it using this tag.
</note>
Using a mask with the template 'marquee fanart round (Custom Marquee)'
Since version 1914 Beta 13, it is possible to apply a mask on this custom marquee
This mask consists of an image in .png format with a transparency zone. The parts that will be masked must be the color indicated in <crop_mask_image_transparent_color> (here: 0;235;114;165). As in the example below.

It is located in the template directory.
Its name is indicated in the tag <crop_mask_image> , here mask_wheel_vince_round.png
You get this after applying the mask:
Here:
<resize width = "538" height = "173" />
Procedure
- Uncheck Auto Template (very important)
- Select one of the following two templates via the Choose Mix button:
- marquee_fanart 1280 v2 (Custom Marquee) (file in %appdata%\Nexouille Soft\resources\templates\marquee_fanart_1280_v2\mix_marquee_fanart_1280_v2.xml)
- marquee fanart round (Custom Marquee) (file %appdata%\Nexouille Soft\resources\templates\marquee_fanart_round\mix_marquee_fanart_round.xml) from ARRM 2.0.3.1 beta 2
- Click on Set as default template (no auto template) button
- Select Mix in the select box Choose the image TAG you want and check Custom Marquee checkbox in the Images Options tab (Custom Marquee is not saved in the settings)
- Select the Roms for which you want to generate the Custom Marquee
- Check that you have checked or that you have the media present in the template (fanart and wheel)
- Click on the Compose Image button if you already have the media, otherwise launch a scrape
- The result will be a file with the chosen suffix (here: -marquee_cropped) (ex: aliensu2-marquee_cropped.png) which will be stored in the Theme-Builder directory, defined in the Folders tab, and is not assigned to any TAG.
- It's up to you to do what you want with it :)
If this Custom Marquee option is not unchecked, when scraping with template mix, the template mix will not be applied and the image will not be generated