Table des matières
Create your own template for ARRM
ARRM allows you to create your own templates that you can use during your scraps by using the 'Mix' mode in 'Images Options'.
Template directory
A template must be positioned in the directory: %appdata%\Nexouille Soft\arrm\ressources\templates\nom_du_template
The name given to the directory (name_of_template) is free of choice.
Be careful, if you create templates, use new directory names otherwise they will be deleted when uninstalling the application during the update process.
This directory (name_of_template) must imperatively contain the following file:
- an .xml file containing the template definition (see code below)
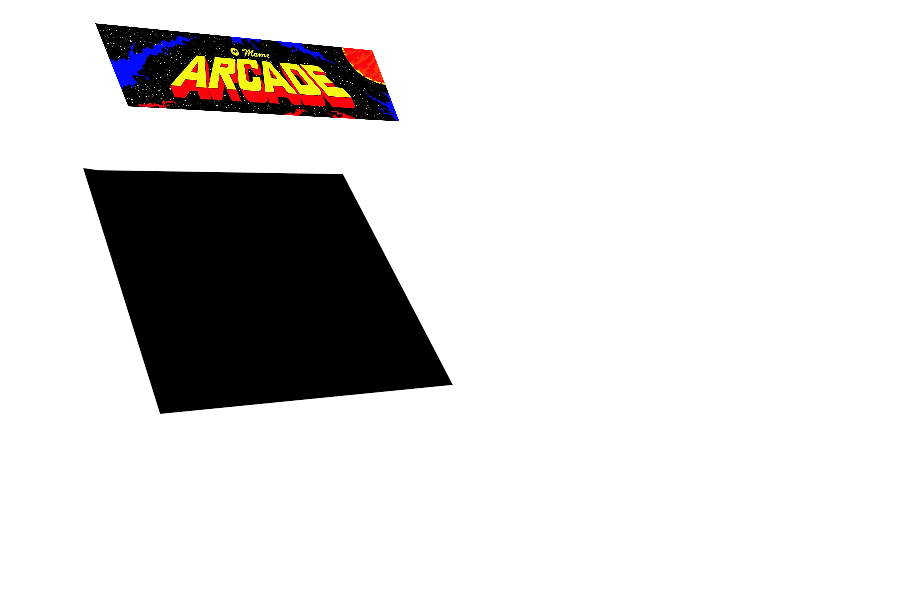
- a .png file with the name you want which will display the preview of the template in the template selection module (you can retrieve it from a scrap mix made with this template).
- Other .png files that will constitute your template can be added in this directory (example background.png, console.png, foreground.png etc…)
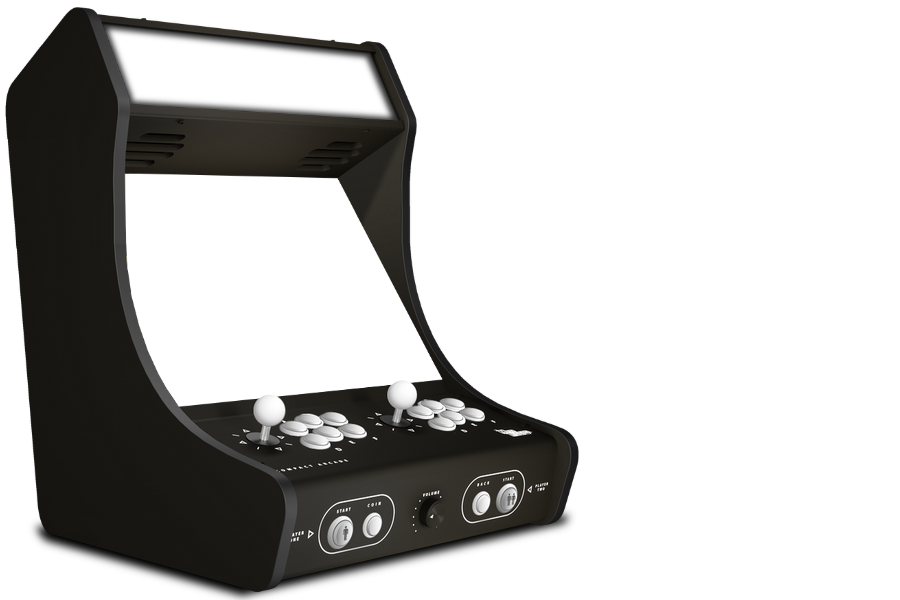
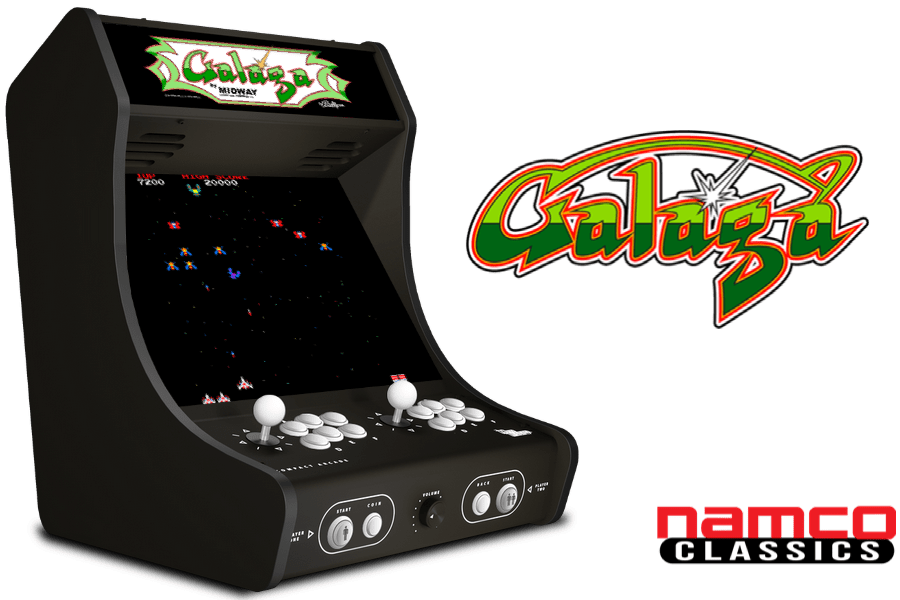
We will take as an example the template ArcadeHome located in the directory %appdata%\Nexouille Soft\Arrm\templates\mix_arcade_ArcadeHome whose final rendering is this:

This directory contains the following items:
- foreground.png
- marquee_screen_common.png
- sample_mix_arcade_arcadehome.png
- mix_arcade_ArcadeHome.xml
ArcadeHome template configuration .xml file
Here is an example of the .xml file of the ArcadeHome template, which you will need to adapt according to the template you want to make. This corresponds to the template 'mix_arcade_ArcadeHome.xml' available in the directory %appdata%\Nexouille Soft\Arrm\templates\mix_arcade_ArcadeHome (see above)
<?xml version="1.0" encoding="utf-8" ?>
<data>
<info>
<author>Franck P.</author>
<description>SET EXTRA1 to marquee and check "black borders" in media assignment to get the upper arcade marquee in the arcade cabinet
set region to true to display regionflag
you can remove system in layer to disable system name
</description>
</info>
<element>
<name>ArcadeHome (conversion of Skraper template)</name>
<sample>sample_mix_arcade_arcadehome.png</sample>

<!--always set it to profile if elements use perspective display-->
<type>profile</type>
<box>true</box>
<marquee>true</marquee>

<!--if screenshot media size is less than the dedicated area of screenshot, it will be fill with black-->
<add_black_borders>true</add_black_borders>

<!--if extra1 media size is less than the dedicated area of extra1 , it will be fill with black-->
<extra1_add_black_borders>true</extra1_add_black_borders>

<!--if system media size is less than the dedicated area of system , it will be fill with black-->
<system_add_black_borders>false</system_add_black_borders>


<!--Size of generated template -->

<custom_background_width>900</custom_background_width>
<custom_background_height>600</custom_background_height>

<!--Assign Extra 1 to (marquee) Screenscraper and set <extra1_add_black_borders> to true -->
<!--It will display arcade marquee in the dedicated area of the arcade cabinet-->

<!--EXTRA1-->
<custom_extra1_ulx>94</custom_extra1_ulx>
<custom_extra1_uly>22</custom_extra1_uly>
<custom_extra1_urx>372</custom_extra1_urx>
<custom_extra1_ury>48</custom_extra1_ury>
<custom_extra1_llx>128</custom_extra1_llx>
<custom_extra1_lly>106</custom_extra1_lly>
<custom_extra1_lrx>400</custom_extra1_lrx>
<custom_extra1_lry>120</custom_extra1_lry>

<!--EXTRA1 area size in the template-->
<custom_extra1_width>278</custom_extra1_width>
<custom_extra1_height>84</custom_extra1_height>


<!--SCREENSHOT-->
<custom_screenshot_ulx>87</custom_screenshot_ulx>
<custom_screenshot_uly>172</custom_screenshot_uly>
<custom_screenshot_urx>339</custom_screenshot_urx>
<custom_screenshot_ury>175</custom_screenshot_ury>
<custom_screenshot_llx>166</custom_screenshot_llx>
<custom_screenshot_lly>411</custom_screenshot_lly>
<custom_screenshot_lrx>446</custom_screenshot_lrx>
<custom_screenshot_lry>378</custom_screenshot_lry>

<!--SCREENSHOT area size in the template-->
<custom_screenshot_width>253</custom_screenshot_width>
<custom_screenshot_height>239</custom_screenshot_height>


<!--MARQUEE-->
<custom_marquee_ulx>445</custom_marquee_ulx>
<custom_marquee_uly>130</custom_marquee_uly>
<custom_marquee_urx>890</custom_marquee_urx>
<custom_marquee_ury>130</custom_marquee_ury>
<custom_marquee_llx>445</custom_marquee_llx>
<custom_marquee_lly>329</custom_marquee_lly>
<custom_marquee_lrx>890</custom_marquee_lrx>
<custom_marquee_lry>329</custom_marquee_lry>

<!--MARQUEE area size in the template-->
<custom_marquee_width>446</custom_marquee_width>
<custom_marquee_height>195</custom_marquee_height>


<!--SYSTEM: it's the name of the system or for arcade the name of the publisher-->
<custom_system_ulx>657</custom_system_ulx>
<custom_system_uly>476</custom_system_uly>
<custom_system_urx>896</custom_system_urx>
<custom_system_ury>476</custom_system_ury>
<custom_system_llx>657</custom_system_llx>
<custom_system_lly>595</custom_system_lly>
<custom_system_lrx>896</custom_system_lrx>
<custom_system_lry>595</custom_system_lry>

<!--SYSTEM area size in the template-->
<custom_system_width>239</custom_system_width>
<custom_system_height>120</custom_system_height>


<!--if <region> is set to true, flags of country will be displayed. Maximum 2 flags -->
<region>false</region>

<!--coordinates of the first flag-->
<custom_region1_x>828</custom_region1_x>
<custom_region1_y>5</custom_region1_y>
<custom_region1_width>60</custom_region1_width>
<custom_region1_height>60</custom_region1_height>

<!--coordinates of the 2nd flag-->
<custom_region2_x>764</custom_region2_x>
<custom_region2_y>5</custom_region2_y>
<custom_region2_width>60</custom_region2_width>
<custom_region2_height>60</custom_region2_height>


<!--Definition of the layers. layer1 is the farthest, layer10 is the closest-->
<layer1>marquee_screen_common.png</layer1>
<layer2>screenshot</layer2>
<layer3>extra1</layer3>
<layer4>foreground.png</layer4>
<layer5>marquee</layer5>
<layer6></layer6>
<layer7></layer7>
<layer8>system</layer8>
<layer9>region1</layer9>
<layer10>region2</layer10>

                 <category>Arcade</category>

</element>
</data>
Another example of an .xml file, usable since ARRM version 1.7.7.5, which allows you to manage the display of boxarts differently depending on their format (portrait, landscape (N64 style), CD), managed by tags:
- <item boxart=“portrait”>
- <item boxart=“landscape”>
- <item boxart=“cd”>
Example with the template file 'Next_Pixel_1080_console.xml' available in the directory %appdata%\Nexouille Soft\arrm\ressources\templates\Next_Pixel_1080_console
<?xml version="1.0" encoding="utf-8"?>
<data>
<info>
<author>Franck P.</author>
<description>Template for NextPixel : CONSOLES snes,gx4000,jaguar,megadrive,neogeo,pcengine,n64,satellaview,sega32x,sufami,3do,amigacd32,dreamcast,gc,neogeocd,pcenginecd,pcfx,ps2,psx,saturn,segacd, supergrafx</description>
</info>
<element>
<name>Next_Pixel_1080_console</name>
<sample>sample_next_pixel_1080_console.png</sample>
<box>true</box>
<marquee>true</marquee>
<add_black_borders>true</add_black_borders>
<custom_background_width>1260</custom_background_width>
<custom_background_height>1080</custom_background_height>
<custom_screenshot_x>400</custom_screenshot_x>
<custom_screenshot_y>143</custom_screenshot_y>
<custom_screenshot_width>640</custom_screenshot_width>
<custom_screenshot_height>480</custom_screenshot_height>

<custom_marquee_x>599</custom_marquee_x>
<custom_marquee_y>712</custom_marquee_y>
<custom_marquee_width>653</custom_marquee_width>
<custom_marquee_height>328</custom_marquee_height>

<custom_boxart_x>9</custom_boxart_x>
<custom_boxart_y>432</custom_boxart_y>
<custom_boxart_width>339</custom_boxart_width>
<custom_boxart_height>625</custom_boxart_height>

<custom_cartridge_x>342</custom_cartridge_x>
<custom_cartridge_y>829</custom_cartridge_y>
<custom_cartridge_width>214</custom_cartridge_width>
<custom_cartridge_height>214</custom_cartridge_height>


<item boxart="portrait">
<custom_boxart_x>9</custom_boxart_x>
<custom_boxart_y>432</custom_boxart_y>
<custom_boxart_width>339</custom_boxart_width>
<custom_boxart_height>625</custom_boxart_height>

<custom_cartridge_x>342</custom_cartridge_x>
<custom_cartridge_y>829</custom_cartridge_y>
<custom_cartridge_width>214</custom_cartridge_width>
<custom_cartridge_height>214</custom_cartridge_height>
</item>

<item boxart="landscape">
<custom_boxart_x>6</custom_boxart_x>
<custom_boxart_y>726</custom_boxart_y>
<custom_boxart_width>500</custom_boxart_width>
<custom_boxart_height>271</custom_boxart_height>

<custom_cartridge_x>65</custom_cartridge_x>
<custom_cartridge_y>546</custom_cartridge_y>
<custom_cartridge_width>277</custom_cartridge_width>
<custom_cartridge_height>178</custom_cartridge_height>
</item>

<item boxart="cd">
<custom_boxart_x>2</custom_boxart_x>
<custom_boxart_y>593</custom_boxart_y>
<custom_boxart_width>365</custom_boxart_width>
<custom_boxart_height>489</custom_boxart_height>
<custom_cartridge_x>288</custom_cartridge_x>
<custom_cartridge_y>800</custom_cartridge_y>
<custom_cartridge_width>271</custom_cartridge_width>
<custom_cartridge_height>271</custom_cartridge_height>
</item>

<resize width="630" height="540" />

<layer1>console.png</layer1>
<layer2>screenshot</layer2>
<layer3>boxart</layer3>
<layer4>marquee</layer4>
<layer5>cartridge</layer5>
<layer7 />
<layer8 />
<layer9 />
<layer10 />

                 <category>Console</category>

</element>
</data>
Description of tags
<name> Template name. It will be displayed in the selection of mixes
<sample> name of the png file containing the sample of the final template. It will be displayed in the selection of mixes
<comment> Informative comment \\
<category> Categories separated by a comma, allowing filtering in the template selection module. See Choose your template
<type> put profile (<type>profile</type>) → If you use perspective views, put <type>profile</type> , otherwise don't put anything.
Since the version 1920 Beta 11 it is also necessary to put the system 8 coordinates for Boxart, BoxBack and Cartridge.
<box> put true (<box>true</box>) , if you want to display the boxart, otherwise false –> this is no longer needed since version 2.0.0.6
<marquee> put true (<marquee>true</marquee>) , if you want to display the marquee (title), otherwise false –> this is no longer needed since version 2.0.0.6
<add_black_borders> set true (<add_black_borders>true</add_black_borders>) to fill in black the surface of the screenshot area (defined by <custom_screenshot_width> and <custom_screenshot_height> ) and then apply the screenshot on this black surface.
<extra1_add_black_borders> set true (<extra1_add_black_borders>true</extra1_add_black_borders>) to fill in black the surface of the area of the extra1 defined by <custom_extra1_width> and <custom_extra1_height>) and then apply the extra1 on this black surface. (from version 1893 beta 6)
<system_add_black_borders> set true (<system_add_black_borders>true</system_add_black_borders>) to fill in black the surface of the system area (defined by <custom_system_width> and <custom_system_height> ) and then applies the system on this black surface. (from version 1893 beta 6)
Final MIX image size (optional)
<custom_background_width> total width of your template image
<custom_background_height> total height of your template image
Since version 2.0.0.6:
<thumbnail_align> set true (<thumbnail_align>true</thumbnail_align>) if you want to align the thumbnail in his area
<marquee3_align> set true (<marquee3_align>true</marquee3_align>) if you want to align the marquee3 in his area
<boxback_align> set true (<boxback_align>true</boxback_align>) if you want to align the boxback in his area
<boxart_align> set true (<boxart_align>true</boxart_align>) if you want to align the boxart in his area
<cartridge_align> set true (<cartridge_align>true</cartridge_align>) if you want to align the cartridge in his area
SCREENSHOT
Coordinates of the screenshot that will be displayed in the template if <type>profile</type> IS filled in.
The screenshot area is represented in yellow on the image below with coordinates in green
<custom_screenshot_ulx> X coordinate of the upper left point of the screenshot in your template <custom_screenshot_uly> Y coordinate of the upper left point of the screenshot in your template <custom_screenshot_urx> X coordinate of the top right point of the screenshot in your template <custom_screenshot_ury> Y coordinate of the top right point of the screenshot in your template <custom_screenshot_llx> X coordinate of the lower left point of the screenshot in your template <custom_screenshot_lly> Y coordinate of the lower left point of the screenshot in your template <custom_screenshot_lrx> X coordinate of the bottom right point of the screenshot in your template <custom_screenshot_lry> Y coordinate of the bottom right point of the screenshot in your template
Coordinates of the screenshot that will be displayed in the template if <type>profile</type> IS NOT filled in.
<custom_screenshot_x> X coordinate of the upper left point of the screenshot in your template
<custom_screenshot_y> Y coordinate of the top left point of the screenshot in your template
Screenshot size (required in all cases)
<custom_screenshot_width> corresponds to the width of the screenshot in the template (calculation: <custom_screenshot_urx> - <custom_screenshot_ulx>)
<custom_screenshot_height> corresponds to the height of the screenshot in the template (calculation: <custom_screenshot_lly> - <custom_screenshot_uly>)

The conditions are as follows:
- portrait: height > width
- landscape: width / height >= 1.3
- cd: width / height >= 1 and < 1.3
<item screenshot="portrait">
<custom_screenshot_x>665</custom_screenshot_x>
<custom_screenshot_y>29</custom_screenshot_y>
<custom_screenshot_width>497</custom_screenshot_width>
<custom_screenshot_height>571</custom_screenshot_height>
</item>

<item screenshot="landscape">
<custom_screenshot_x>1177</custom_screenshot_x>
<custom_screenshot_y>439</custom_screenshot_y>
<custom_screenshot_width>733</custom_screenshot_width>
<custom_screenshot_height>477</custom_screenshot_height>
</item>

<item screenshot="cd">
<custom_screenshot_x>41</custom_screenshot_x>
<custom_screenshot_y>29</custom_screenshot_y>
<custom_screenshot_width>570</custom_screenshot_width>
<custom_screenshot_height>570</custom_screenshot_height>
</item>
BOXART
Coordinates of the boxart that will be displayed in the template if <type>profile</type> EST filled in.
<custom_boxart_ulx> X coordinate of the top left point of the boxart in your template <custom_boxart_uly> Y coordinate of the top left point of the boxart in your template <custom_boxart_urx> X coordinate of the top right point of the boxart in your template <custom_boxart_ury> Y coordinate of the top right point of the boxart in your template <custom_boxart_llx> X coordinate of the bottom left point of the boxart in your template <custom_boxart_lly> Y coordinate of the bottom left point of the boxart in your template <custom_boxart_lrx> X coordinate of the bottom right point of the boxart in your template <custom_boxart_lry> Y coordinate of the bottom right point of the boxart in your template
Coordinates of the boxart that will be displayed in the template if <type>profile</type> IS NOT filled in.
<custom_boxart_x> X coordinate of the top left point of the boxart in your template <custom_boxart_y> Y coordinate of the top left point of the boxart in your template
Boxart size (necessary in all cases)
<custom_boxart_width> corresponds to the width of the Boxart
<custom_boxart_height> corresponds to the height of the Boxart , Be careful that (custom_boxart_y + custom_boxart_height) are not > to custom_background_height otherwise the boxart would come out of the screen.
tag The conditions are as follows:
- portrait: height > width
- landscape: width / height >= 1.3
- cd: width / height >= 1 and < 1.3
<item boxart="portrait">
<custom_boxart_x>0</custom_boxart_x>
<custom_boxart_y>240</custom_boxart_y>
<custom_boxart_width>360</custom_boxart_width>
<custom_boxart_height>360</custom_boxart_height>

<custom_cartridge_x>160</custom_cartridge_x>
<custom_cartridge_y>410</custom_cartridge_y>
<custom_cartridge_width>160</custom_cartridge_width>
<custom_cartridge_height>160</custom_cartridge_height>
</item>

<item boxart="landscape">
<custom_boxart_x>0</custom_boxart_x>
<custom_boxart_y>240</custom_boxart_y>
<custom_boxart_width>360</custom_boxart_width>
<custom_boxart_height>360</custom_boxart_height>

<custom_cartridge_x>40</custom_cartridge_x>
<custom_cartridge_y>260</custom_cartridge_y>
<custom_cartridge_width>160</custom_cartridge_width>
<custom_cartridge_height>160</custom_cartridge_height>
</item>

<item boxart="cd">
<custom_boxart_x>0</custom_boxart_x>
<custom_boxart_y>240</custom_boxart_y>
<custom_boxart_width>360</custom_boxart_width>
<custom_boxart_height>360</custom_boxart_height>

<custom_cartridge_x>160</custom_cartridge_x>
<custom_cartridge_y>410</custom_cartridge_y>
<custom_cartridge_width>160</custom_cartridge_width>
<custom_cartridge_height>160</custom_cartridge_height>
</item>

thumbnail
Coordinates of the thumbnail that will be displayed in the template if <type>profile</type> IS filled in.
<custom_thumbnail_ulx> X coordinate of the top left point of the thumbnail in your template
<custom_thumbnail_uly> Y coordinate of the top left point of the thumbnail in your template
<custom_thumbnail_urx> X coordinate of the top right point of the thumbnail in your template
<custom_thumbnail_ury> Y coordinate of the top right point of the thumbnail in your template
<custom_thumbnail_llx> X coordinate of the bottom left point of the thumbnail in your template
<custom_thumbnail_lly> Y coordinate of the bottom left point of the thumbnail in your template
<custom_thumbnail_lrx> X coordinate of the bottom right point of the thumbnail in your template
<custom_thumbnail_lry> Y coordinate of the bottom right point of the thumbnail in your template
Coordinates of the thumbnail that will be displayed in the template if <type>profile</type> IS NOT filled in.
<custom_thumbnail_x> X coordinate of the top left point of the thumbnail in your template
<custom_thumbnail_y> Y coordinate of the top left point of the thumbnail in your template
thumbnail size (required in all cases)
<custom_thumbnail_width> corresponds to the width of the thumbnail in the template (calculation: <custom_thumbnail_urx> - <custom_thumbnail_ulx>)
<custom_thumbnail_height> corresponds to the height of the thumbnail in the template (calculation: <custom_thumbnail_lly> - <custom_thumbnail_uly>)
MARQUEE3
Coordinates of the marquee3 that will be displayed in the template if <type>profile</type> IS filled in.
The marquee3 area is shown in yellow on the image below with coordinates in green
<custom_marquee3_ulx> X coordinate of the top left point of the marquee3 in your template
<custom_marquee3_uly> Y coordinate of the top left point of the marquee3 in your template
<custom_marquee3_urx> X coordinate of the top right point of the marquee3 in your template
<custom_marquee3_ury> Y coordinate of the top right point of the marquee3 in your template
<custom_marquee3_llx> X coordinate of the bottom left point of the marquee3 in your template
<custom_marquee3_lly> Y coordinate of the bottom left point of the marquee3 in your template
<custom_marquee3_lrx> X coordinate of the bottom right point of the marquee3 in your template
<custom_marquee3_lry> Y coordinate of the bottom right point of the marquee3 in your template
Coordinates of the marquee3 Title that will be displayed in the template if <type>profile</type> IS NOT filled in.
<custom_marquee3_x> X coordinate of the top left point of the marquee3 in your template
<custom_marquee3_y> Y coordinate of the top left point of the marquee3 in your template
Size of the marquee3 / Title (required in all cases)
<custom_marquee3_width> corresponds to the width of the marquee3 in the template (calculation: <custom_marquee3_urx> - <custom_marquee3_ulx>)
<custom_marquee3_height> corresponds to the height of the marquee3 in the template (calculation: <custom_marquee3_lly> - <custom_marquee3_uly>)

MARQUEE
Coordinates of the Marquee / Title that will be displayed in the template if <type>profile</type> IS filled in.
The Marquee area is shown in yellow on the image below with coordinates in green
<custom_marquee_ulx> X coordinate of the top left point of the marquee in your template
<custom_marquee_uly> Y coordinate of the top left point of the marquee in your template
<custom_marquee_urx> X coordinate of the top right point of the marquee in your template
<custom_marquee_ury> Y coordinate of the top right point of the marquee in your template
<custom_marquee_llx> X coordinate of the bottom left point of the marquee in your template
<custom_marquee_lly> Y coordinate of the bottom left point of the marquee in your template
<custom_marquee_lrx> X coordinate of the bottom right point of the marquee in your template
<custom_marquee_lry> Y coordinate of the bottom right point of the marquee in your template
Coordinates of the Marquee / Title that will be displayed in the template if <type>profile</type> IS NOT filled in.
<custom_marquee_x> X coordinate of the top left point of the marquee in your template
<custom_marquee_y> Y coordinate of the top left point of the marquee in your template
Size of the Marquee / Title (required in all cases)
<custom_marquee_width> corresponds to the width of the marquee in the template (calculation: <custom_marquee_urx> - <custom_marquee_ulx>)
<custom_marquee_height> corresponds to the height of the marquee in the template (calculation: <custom_marquee_lly> - <custom_marquee_uly>)
MARQUEE2
It is possible to display a 2nd Marquee/title at another place of the image. Same principle as the MARQUEE
In this case, add the following lines:
Coordinates of the 2nd Marquee/title that will be displayed in the template if <type>profile</type> IS filled in.
<custom_marquee2_ulx> X coordinate of the top left point of marquee2 in your template
<custom_marquee2_uly> Y coordinate of the top left point of marquee2 in your template
<custom_marquee2_urx> X coordinate of the top right point of marquee2 in your template
<custom_marquee2_ury> Y coordinate of the top right point of marquee2 in your template
<custom_marquee2_llx> X coordinate of the bottom left point of marquee2 in your template
<custom_marquee2_lly> Y coordinate of the bottom left point of marquee2 in your template
<custom_marquee2_lrx> X coordinate of the bottom right point of marquee2 in your template
<custom_marquee2_lry> Y coordinate of the bottom right point of marquee2 in your template
Coordinates of the Marquee / Title that will be displayed in the template if <type>profile</type> IS NOT filled in.
<custom_marquee2_x> X coordinate of the top left point of marquee2 in your template
<custom_marquee2_y> Y coordinate of the top left point of marquee2 in your template
Size of Marquee2 / Title (required in all cases)
<custom_marquee2_width> corresponds to the width of marquee2 in the template (calculation: <custom_marquee2_urx> - <custom_marquee2_ulx>)
<custom_marquee2_height> corresponds to the height of marquee2 in the template (calculation: <custom_marquee2_lly> - <custom_marquee2_uly>)
FANART
Coordinates of the FANART which will be displayed in the template if <type>profile</type> IS filled in.
<custom_fanart_ulx> X coordinate of the top left point of the fanart in your template
<custom_fanart_uly> Y coordinate of the top left point of the fanart in your template
<custom_fanart_urx> X coordinate of the top right point of the fanart in your template
<custom_fanart_ury> Y coordinate of the top right point of the fanart in your template
<custom_fanart_llx> X coordinate of the bottom left point of the fanart in your template
<custom_fanart_lly> Y coordinate of the bottom left point of the fanart in your template
<custom_fanart_lrx> X coordinate of the bottom right point of the fanart in your template
<custom_fanart_lry> Y coordinate of the bottom right point of the fanart in your template
Coordinates of the FANART that will be displayed in the template if <type>profile</type> IS NOT filled in.
<custom_fanart_x> X coordinate of the top left point of the fanart in your template
<custom_fanart_y> Y coordinate of the top left point of the fanart in your template
Size of the fanart (necessary in any case)
<custom_fanart_width> corresponds to the width of the fanart in the template (calculation: <custom_fanart_urx> - <custom_fanart_ulx>)
<custom_fanart_height> corresponds to the height of the fanart in the template (calculation: <custom_fanart_lly> - <custom_fanart_uly>)
The conditions are as follows:
- steam: width / height >= 2.5
- Standard: (width / height >= 1) and (width / height < 2.5)
Example with the fanart screenshot 720p template:
Depending on the format, one layer can be replaced by another.
Here, the screenshot on the <layer2> is replaced by a fanart on <layer2>
<layer2>screenshot</layer2>

<item fanart="standard">
<!-- <layer1>background.png</layer1> -->
<custom_fanart_x>0</custom_fanart_x>
<custom_fanart_y>0</custom_fanart_y>
<custom_fanart_width>1280</custom_fanart_width>
<custom_fanart_height>720</custom_fanart_height>
<layer2>fanart</layer2>
</item>

<item fanart="steam">
<layer1>background.png</layer1>
<custom_fanart_x>0</custom_fanart_x>
<custom_fanart_y>0</custom_fanart_y>
<custom_fanart_width>1280</custom_fanart_width>
<custom_fanart_height>720</custom_fanart_height>
<layer2>fanart</layer2>
</item>
TITLESHOT
Coordinates of the titleshot that will be displayed in the template if <type>profile</type> IS filled in.
<custom_titleshot_ulx> X coordinate of the top left point of the titleshot in your template
<custom_titleshot_uly> Y coordinate of the top left point of the titleshot in your template
<custom_titleshot_urx> X coordinate of the top right point of the titleshot in your template
<custom_titleshot_ury> Y coordinate of the top right point of the titleshot in your template
<custom_titleshot_llx> X coordinate of the bottom left point of the titleshot in your template
<custom_titleshot_lly> Y coordinate of the bottom left point of the titleshot in your template
<custom_titleshot_lrx> X coordinate of the bottom right point of the titleshot in your template
<custom_titleshot_lry> Y coordinate of the bottom right point of the titleshot in your template
Coordinates of the titleshot that will be displayed in the template if <type>profile</type> IS NOT filled in.
<custom_titleshot_x> X coordinate of the top left point of the titleshot in your template
<custom_titleshot_y> Y coordinate of the top left point of the titleshot in your template
Titleshot size (required in all cases)
<custom_titleshot_width> corresponds to the width of the titleshot in the template (calculation: <custom_titleshot_urx> - <custom_titleshot_ulx>)
<custom_titleshot_height> corresponds to the height of the titleshot in the template (calculation: <custom_titleshot_lly> - <custom_titleshot_uly>)
CARTRIDGE
Cartridge coordinates that will be displayed in the template if <type>profile</type> EST entered.
<custom_cartridge_ulx> X coordinate of the top left point of the cartridge in your template <custom_cartridge_uly> Y coordinate of the top left point of the cartridge in your template <custom_cartridge_urx> X coordinate of the top right point of the cartridge in your template <custom_cartridge_ury> Y coordinate of the top right point of the cartridge in your template <custom_cartridge_llx> X coordinate of the bottom left point of the cartridge in your template <custom_cartridge_lly> Y coordinate of the bottom left point of the cartridge in your template <custom_cartridge_lrx> X coordinate of the bottom right point of the cartridge in your template <custom_cartridge_lry> Y coordinate of the bottom right point of the cartridge in your template
Coordinates of the cartridge that will be displayed in the template if <type>profile</type> IS NOT filled in.
<custom_cartridge_x> X coordinate of the top left point of the cartridge in your template <custom_cartridge_y> Y coordinate of the top left point of the cartridge in your template
Cartridge size (necessary in all cases)
<custom_cartridge_width> corresponds to the width of the cartridge
<custom_cartridge_height> corresponds to the height of the cartridge, be careful that (custom_cartridge_y + custom_cartridge_height) are not > to custom_background_height otherwise the cartridge would come out of the screen.
The conditions are as follows:
- portrait: height > width
- landscape: width / height >= 1.3
- cd: width / height >= 1 and < 1.3
<item cartridge="portrait">
<custom_cartridge_x>160</custom_cartridge_x>
<custom_cartridge_y>410</custom_cartridge_y>
<custom_cartridge_width>160</custom_cartridge_width>
<custom_cartridge_height>160</custom_cartridge_height>
</item>

<item cartridge="landscape">
<custom_cartridge_x>40</custom_cartridge_x>
<custom_cartridge_y>260</custom_cartridge_y>
<custom_cartridge_width>160</custom_cartridge_width>
<custom_cartridge_height>160</custom_cartridge_height>
</item>

<item cartridge="cd">
<custom_cartridge_x>160</custom_cartridge_x>
<custom_cartridge_y>410</custom_cartridge_y>
<custom_cartridge_width>200</custom_cartridge_width>
<custom_carheight_height>200</custom_cartridge_height>
</item>
BOXBACK
(from version 1882 beta 11)
Coordinates of the boxback that will be displayed in the template if <type>profile</type> EST filled in.
<custom_boxback_ulx> X coordinate of the top left point of the boxback in your template <custom_boxback_uly> Y coordinate of the top left point of the boxback in your template <custom_boxback_urx> X coordinate of the top right point of the boxback in your template <custom_boxback_ury> Y coordinate of the top right point of the boxback in your template <custom_boxback_llx> X coordinate of the bottom left point of the boxback in your template <custom_boxback_lly> Y coordinate of the bottom left point of the boxback in your template <custom_boxback_lrx> X coordinate of the bottom right point of the boxback in your template <custom_boxback_lry> Y coordinate of the bottom right point of the boxback in your template
Coordinates of the boxback that will be displayed in the template if <type>profile</type> IS NOT filled in.
<custom_boxback_x> X coordinate of the top left point of the boxback in your template <custom_boxback_y> Y coordinate of the top left point of the boxback in your template
Boxback size (necessary in all cases)
<custom_boxback_width> corresponds to the width of the BoxBack
<custom_boxback_height> corresponds to the height of the BoxBack , Be careful that (custom_boxback_y + custom_boxback_height) are not > to custom_background_height otherwise the BoxBack would come out of the screen.
tag The conditions are as follows:
- portrait: height > width
- landscape: width / height >= 1.3
- cd: width / height >= 1 and < 1.3
<item boxback="portrait">
<custom_boxback_x>0</custom_boxback_x>
<custom_boxback_y>240</custom_boxback_y>
<custom_boxback_width>360</custom_boxback_width>
<custom_boxback_height>360</custom_boxback_height>
</item>

<item boxback="landscape">
<custom_boxback_x>0</custom_boxback_x>
<custom_boxback_y>240</custom_boxback_y>
<custom_boxback_width>360</custom_boxback_width>
<custom_boxback_height>360</custom_boxback_height>
         </item>

<item boxback="cd">
<custom_boxback_x>0</custom_boxback_x>
<custom_boxback_y>240</custom_boxback_y>
<custom_boxback_width>360</custom_boxback_width>
<custom_boxback_height>360</custom_boxback_height>
</item>
EXTRA1
(from version 1892 beta 1)
Coordinates of the EXTRA1 which will be displayed in the template if <type>profile</type> IS filled in.
<custom_extra1_ulx> X coordinate of the top left point of the extra1 in your template
<custom_extra1_uly> Y coordinate of the top left point of the extra1 in your template
<custom_extra1_urx> X coordinate of the top right point of the extra1 in your template
<custom_extra1_ury> Y coordinate of the top right point of the extra1 in your template
<custom_extra1_llx> X coordinate of the lower left point of the extra1 in your template
<custom_extra1_lly> Y coordinate of bottom left point of extra1 in your template
<custom_extra1_lrx> X coordinate of the bottom right point of the extra1 in your template
<custom_extra1_lry> Y coordinate of the lower right point of the extra1 in your template
Coordinates of the EXTRA1 which will be displayed in the template if <type>profile</type> IS NOT filled in.
<custom_extra1_x> X coordinate of the top left point of the extra1 in your template
<custom_extra1_y> Y coordinate of the top left point of extra1 in your template
Size of EXTRA1 (required in all cases)
<custom_extra1_width> corresponds to the width of the extra1 in the template (calculation: <custom_extra1_urx> - <custom_extra1_ulx>)
<custom_extra1_height> corresponds to the height of the extra1 in the template (calculation: <custom_extra1_lly> - <custom_extra1_uly>)
SYSTEM
(from version 1893 beta 5)
.
It is used to display the name of the system or, for Arcade systems, the name of the Arcade system. The media corresponds to the Wheel tag of the systems on screenscraper and is located in the directory: %appdata%\Nexouille Soft\arrm\ressources\logos_wheel\%nom_du_system%.png
You can see SYSTEM in ArcadeHome template

Coordinates of the SYSTEM that will be displayed in the template if <type>profile</type> IS filled in.
<custom_system_ulx> X coordinate of the top left point of the system in your template
<custom_system_uly> Y coordinate of the top left point of the system in your template
<custom_system_urx> X coordinate of the top right point of the system in your template
<custom_system_ury> Y coordinate of the top right point of the system in your template
<custom_system_llx> X coordinate of the bottom left point of the system in your template
<custom_system_lly> Y coordinate of the bottom left point of the system in your template
<custom_system_lrx> X coordinate of the lower right point of the system in your template
<custom_system_lry> Y coordinate of the bottom right point of the system in your template
Coordinates of the SYSTEM which will be displayed in the template if <type>profile</type> IS NOT filled in.
<custom_system_x> X coordinate of the top left point of the system in your template
<custom_system_y> Y coordinate of the top left point of the system in your template
SYSTEM size (required in all cases)
<custom_system_width> corresponds to the width of the extra1 in the template (calculation: <custom_system_urx> - <custom_system_ulx>)
<custom_system_height> corresponds to the height of the extra1 in the template (calculation: <custom_system_lly> - <custom_system_uly>)
<resize width=“630” height=“540” /> tells ARRM (since version 1.7.7.6) to resize the mix with a width of 630px and a height of 540px
Definition of Layers / Layers
ARRM can combine 10 layers / layers ( 15 since version 1.9.1.2 beta 19 ), which are a stacking from the bottommost layer (layer1) to the frontmost one (layer10).
Not all layers are necessarily filled in, as in the example given.
A layer can contain a .png image file located in the template directory, or one of the following tags:
- screenshot
- box art
- marquee (corresponds to the <wheel> tag of the gamelist)
- marquee2 (if the marquee is displayed on a 2nd position) (corresponds to the <wheel> tag of the gamelist)
- cartridge
- fanart
- titleshot
- boxback
- extra1
- system (displays the name of the system or for Arcade systems the name of the Arcade system. Uses the wheels available in the directory %appdata%\Nexouille soft\arrm\ressources\logos_wheel )
In the example, the background consists of the terminal's black screen.
In the example, the foreground consists of the terminal. (the screen area is in transparent mode)
In the xml code below, we see that the background (the black screen) is first displayed, then comes the screenshot and then the foreground (the terminal). Layers 4, 5, and 6 will be in the foreground.
<layer1>background.png</layer1>
<layer2>screenshot</layer2>
<layer3>foreground.png</layer3>
<layer4>boxart</layer4>
<layer5>marquee</layer5>
<layer6>brand2</layer6>
<layer7></layer7>
<layer8></layer8>
<layer9></layer9>
<layer10></layer10>
<layer11></layer11>
<layer12></layer12>
<layer13></layer13>
<layer14></layer14>
<layer15></layer15>
Since version 1.9.1.2 Beta 19 it is possible to add full file paths in layers.
<custom_background_width>
<custom_background_height>
Two variables can be used in these paths:
%%system%%
: takes the name of the current system folder (genesis, arcade, atari7800…)
%%game_file_name%%
: takes the name of the current ROM file without extension
example of layer with these variables:
<layer1>M:\Retrobat\decorations\mybezels16-9\systems\%%system%%.png</layer1>
<layer4>M:\Retrobat\decorations\mybezels16-9\games\%%system%%\%%game_file_name%%.png</layer4>
<layer5>C:\temp\test.png</layer5>
Conditional Layers
Since version 1.9.1.3 Beta 9, layers can be placed according to the format of :
- screenshots,
- boxart,
- cartridge,
- boxback,
- marquee3,
- thumbnail
The possible formats are :
- portrait,
- cd,
- landscape
as in the example of the mix_splash_mame template below by Ian Murray/TVsIan with layer3, layer4 and layer5
<?xml version="1.0" encoding="utf-8" ?>
<data>
     <info>
         <author>Ian Murray</author>
         <description>Splash Screen MAME
             Bezel art by Duimon - https://github.com/Duimon/Retroarch-Overlays
             Make the layer5 tag empty to hide the fanart and only use the bezel and screenshot.
         </description>
     </info>
     <element>
         <name>Splash Screen MAME</name>
         <sample>mix_splash_MAME.png</sample>
<layers>true</layers>
         <marquee>true</marquee>
         <fanart>true</fanart>
         <system>true</system>

         <add_black_borders>true</add_black_borders>
         <fanart_add_black_borders>true</fanart_add_black_borders>

         <custom_background_width>1920</custom_background_width>
         <custom_background_height>1080</custom_background_height>

<custom_screenshot_x>273</custom_screenshot_x>
         <custom_screenshot_y>24</custom_screenshot_y>
         <custom_screenshot_width>1374</custom_screenshot_width>
<custom_screenshot_height>1032</custom_screenshot_height>

<custom_marquee_x>560</custom_marquee_x>
<custom_marquee_y>50</custom_marquee_y>
<custom_marquee_width>800</custom_marquee_width>
<custom_marquee_height>300</custom_marquee_height>

<custom_boxart_x>300</custom_boxart_x>
<custom_boxart_y>730</custom_boxart_y>
<custom_boxart_width>300</custom_boxart_width>
<custom_boxart_height>300</custom_boxart_height>

<custom_system_x>1300</custom_system_x>
<custom_system_y>880</custom_system_y>
<custom_system_width>300</custom_system_width>
<custom_system_height>150</custom_system_height>

<layer3>scanlines-v.png</layer3>
<layer4>foreground-v.png</layer4>
<layer5>fanart</layer5>

         <item screenshot="portrait">
             <custom_screenshot_x>574</custom_screenshot_x>
             <custom_screenshot_y>30</custom_screenshot_y>
             <custom_screenshot_width>772</custom_screenshot_width>
             <custom_screenshot_height>1020</custom_screenshot_height>

             <custom_marquee_x>760</custom_marquee_x>
             <custom_marquee_y>65</custom_marquee_y>
             <custom_marquee_width>400</custom_marquee_width>
             <custom_marquee_height>250</custom_marquee_height>

             <custom_boxart_x>625</custom_boxart_x>
             <custom_boxart_y>730</custom_boxart_y>
             <custom_boxart_width>200</custom_boxart_width>
             <custom_boxart_height>200</custom_boxart_height>

             <custom_system_x>1096</custom_system_x>
             <custom_system_y>880</custom_system_y>
             <custom_system_width>200</custom_system_width>
             <custom_system_height>100</custom_system_height>

             <layer3>scanlines-v.png</layer3>
             <layer4>foreground-v.png</layer4>
<layer5></layer5>
         </item>


         <item screenshot="landscape">
             <custom_screenshot_x>273</custom_screenshot_x>
             <custom_screenshot_y>24</custom_screenshot_y>
             <custom_screenshot_width>1374</custom_screenshot_width>
             <custom_screenshot_height>1032</custom_screenshot_height>

             <custom_marquee_x>560</custom_marquee_x>
             <custom_marquee_y>50</custom_marquee_y>
             <custom_marquee_width>800</custom_marquee_width>
             <custom_marquee_height>300</custom_marquee_height>

             <custom_boxart_x>300</custom_boxart_x>
             <custom_boxart_y>730</custom_boxart_y>
             <custom_boxart_width>300</custom_boxart_width>
             <custom_boxart_height>300</custom_boxart_height>

             <custom_system_x>1300</custom_system_x>
             <custom_system_y>880</custom_system_y>
             <custom_system_width>300</custom_system_width>
             <custom_system_height>150</custom_system_height>

             <layer3>scanlines-h.png</layer3>
             <layer4>foreground-h.png</layer4>
             <layer5></layer5>
         </item>


         <item screenshot="cd">
             <custom_screenshot_x>273</custom_screenshot_x>
             <custom_screenshot_y>24</custom_screenshot_y>
             <custom_screenshot_width>1374</custom_screenshot_width>
             <custom_screenshot_height>1032</custom_screenshot_height>

             <custom_marquee_x>560</custom_marquee_x>
             <custom_marquee_y>50</custom_marquee_y>
             <custom_marquee_width>800</custom_marquee_width>
             <custom_marquee_height>300</custom_marquee_height>

             <custom_boxart_x>300</custom_boxart_x>
             <custom_boxart_y>730</custom_boxart_y>
             <custom_boxart_width>300</custom_boxart_width>
             <custom_boxart_height>300</custom_boxart_height>

             <custom_system_x>1300</custom_system_x>
             <custom_system_y>880</custom_system_y>
             <custom_system_width>300</custom_system_width>
             <custom_system_height>150</custom_system_height>

             <layer3>scanlines-h.png</layer3>
             <layer4>foreground-h.png</layer4>
<layer5></layer5>
         </item>

         <custom_fanart_x>0</custom_fanart_x>
         <custom_fanart_y>0</custom_fanart_y>
         <custom_fanart_width>1920</custom_fanart_width>
         <custom_fanart_height>1080</custom_fanart_height>

<layer1>background.png</layer1>
<layer2>screenshot</layer2>
<layer6></layer6>
<layer7>marquee</layer7>
<layer8></layer8>
<layer9>system</layer9>
<layer10></layer10>

<category>Splash Screens,Arcade,MAME,TVsIan</category>

     </element>

</data>
Add texts in your Mixes
Since version 2.0.0.5, you can add textual information retrieved from the database to your Mix templates, which are:
- Game title
- Developer
- Editor
- Release date (year)
- Gender
- Numbers of players
- Rqting
- Description of the game
We use a template to which we add textual information at the very end of the creation of the media (on the last layer)
The texts to be displayed are defined in tags containing the parameters separated by ; (semicolon) These parameters define in order:
- - The label to display in front of the tag (the only parameter that can be left empty)
- - X coordinate
- - Y coordinate
- - Text width
- - Text height
- - Font name
- - Font size
- - Font color (You can find color name here)
- - Text alignement (left, center or right)
Example :
<gametitle_text>;545;0;855;76;Times New Roman;40;red;center</gametitle_text>
<developer_text>Developer: ;545;70;471;46;Times New Roman;30;black;left</developer_text>
<publisher_text>Publisher: ;545;126;471;46;Times New Roman;30;blackl;left</publisher_text>
<date_text>Release Date: ;545;182;471;46;Times New Roman;30;black;left</date_text>
<genre_text>Genre: ;545;238;471;46;Times New Roman;30;black;left</genre_text>
<players_text>Players: ;545;294;471;46;Times New Roman;30;black;left</players_text>
<description_text>;550;366;882;376;Times New Roman;25;black;left</description_text>
<rating_text>Rating: ;178;736;213;46;Times New Roman;25;blue;center</rating_text>
As an example you can take inspiration from template which allows you to generate game files: Generate Gamesheet
These text tags can be used in all templates offered by ARRM. It's up to you to add them
Share your creations
Do not hesitate to study the available templates, especially those offering integration of the cartridge inserted into the console (mix_atari_2600_cartridge, mix_snes …) which will allow you to understand how to use the layers.
If you create templates, do not hesitate to send them to me by Mail, I will put them for download on the JujuVinceBros website in the section Template pour ARRM, in order to share it with other ARRM users.